
The One Accessory Most Indoor Cyclists Overlook
Setting up a home cycling station takes thought. You invest in a quality trainer, a good mat, and maybe a fan. However, many cyclists forget one small but important item — the front wheel riser block. This simple accessory can change how your bike sits, how your body feels, and how effective your training becomes.
If you have ever hopped on your indoor trainer and felt something was slightly off, this might be the reason. The front wheel drops lower than the rear when the back wheel is lifted by the trainer. That small height difference creates a big chain reaction throughout your entire body.
What Is a Front Wheel Riser Block?
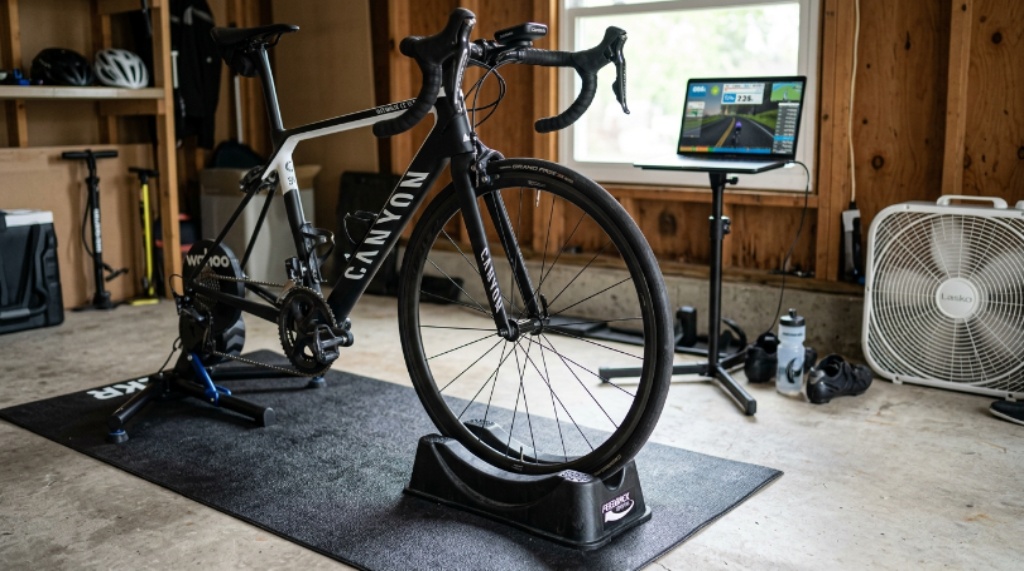
A front wheel riser block is a small, wedge-shaped or platform-style block that sits under your front wheel while you ride indoors. It lifts the front of your bike to match the height of the rear wheel, which is already elevated by your trainer.
Most blocks are made from hard plastic or dense foam. They are lightweight, portable, and easy to store. Some models have multiple height levels to suit different trainer setups. Additionally, some blocks include a small groove or tray to keep your wheel from rolling or slipping during intense efforts.
Despite being one of the least expensive cycling accessories available, the riser block delivers a surprisingly large return on such a small investment.
Why Bike Level Matters More Than You Think
When your bike sits level, your body sits level too. This sounds simple, but the effects go deeper than comfort.
A tilted bike shifts your center of gravity forward. Therefore, more of your body weight presses down onto your hands and wrists. Over a long ride, this leads to numbness, discomfort, and even pain in your shoulders and neck. Many cyclists blame their saddle or handlebar setup when the actual problem is the angle of the entire bike.
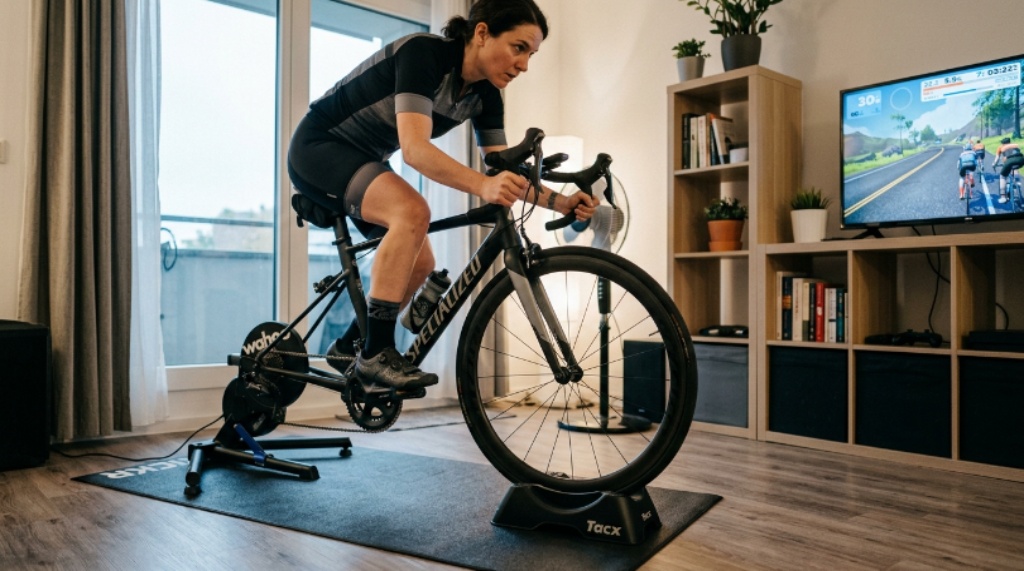
Proper indoor trainer balance starts with the foundation. If the base is off, everything above it is off too. A level bike lets your hips sit naturally, your spine stay neutral, and your arms bear only the weight they are meant to bear.
The Role of Wheel Support in Injury Prevention
Riding without a riser block puts your joints in a compromised position every time you clip in. Your knees track forward more than they should. Your lower back rounds slightly to compensate for the forward lean. Over dozens of indoor sessions, these small misalignments add up.
Good wheel support does more than stabilize your tire. It sets the geometry of your whole riding position. When the front of your bike has a solid, level platform to rest on, your pedaling motion becomes cleaner and more efficient.
Cyclists who train indoors frequently — especially during winter or in preparation for an event — need to pay close attention to this. The higher your training volume, the more every degree of misalignment matters. Therefore, a riser block is not just a comfort tool. It is an injury prevention tool.
Performance Benefits You Will Actually Notice
Comfort and safety are compelling enough reasons on their own. However, there are also direct performance benefits to using a riser block.
When your bike sits at the correct angle, your breathing is easier. A forward-tilted torso compresses your diaphragm slightly, making deep breaths harder during intense intervals. A level position opens your chest and allows your lungs to fully expand.
Your power output may also improve. Clean pedaling mechanics — made possible by proper indoor trainer balance — mean less wasted energy. Each pedal stroke transfers more directly into forward (or virtual) movement rather than being absorbed by awkward body positioning.
Additionally, your cadence can feel more natural when you are not fighting against an unintended incline. Many cyclists report that their higher-cadence work feels smoother and more controlled once they start using a riser block.
Choosing the Right Riser Block for Your Setup
Not all riser blocks work the same way for every trainer. Here are a few things to consider when picking one:
- Height compatibility: Check how much your trainer raises your rear wheel and choose a block that matches. Many blocks offer two or three height settings for this reason.
- Tire width: Some blocks have a wider channel to accommodate gravel or mountain bike tires. Make sure your tire fits securely.
- Surface grip: A block with a rubberized bottom will stay in place on smooth floors, especially during standing efforts or sprints.
- Durability: Dense, hard plastic tends to last longer than soft foam. If you train frequently, invest in a more solid option.
- Portability: If you travel or move your setup between rooms, a lightweight foldable block is worth considering.
There are many affordable options available, ranging from basic single-level blocks to adjustable multi-tier platforms. You do not need to spend a lot to get a good one.
Setting Up Your Riser Block Correctly
Using a riser block is straightforward. Place the block directly in front of your trainer, centered with where your front wheel will rest. Set your bike in the trainer, then roll the front wheel forward until it sits in the groove or on top of the block.
Stand back and check that the bike looks level from the side. The top tube should run parallel to the floor. If it still tilts forward, try a higher setting on an adjustable block.
Once the bike is level, you are ready to ride. You will likely notice the difference immediately. Sitting on a level bike after riding on an uneven one feels more stable and more natural from the very first pedal stroke.
Conclusion
A front wheel riser block is a small addition that makes a significant difference. It corrects the tilt caused by your rear-wheel trainer, restores the natural geometry of your bike, and protects your joints during long indoor sessions. Proper indoor trainer balance and reliable wheel support are not luxury features — they are the foundation of smart, sustainable training. Whether you are a casual rider putting in easy winter miles or a competitive cyclist doing structured intervals, a riser block belongs in your setup. It costs very little, takes up almost no space, and pays for itself in comfort and injury prevention alone.
Frequently Asked Questions
Do I really need a riser block if my trainer already feels stable?
Yes. Stability and level positioning are two different things. Your trainer may hold your bike firmly, but without a riser block, the front end is still lower than the rear. That angle affects your posture and comfort over time.
Can I use books or other household items instead of a riser block?
You can, but it is not recommended. Household substitutes are rarely the right height, can be slippery, and may compress or shift under the weight and movement of riding. A proper block is safer and more consistent.
How high should my riser block be?
The goal is a level bike. Most direct-drive trainers raise the rear wheel by about 3 to 5 centimeters. Choose a block height that matches this. Many adjustable blocks let you test different levels to find the right fit.
Does a riser block work with all types of indoor trainers?
Yes. Whether you use a wheel-on trainer, a direct-drive trainer, or a roller setup, a riser block improves your riding position by leveling the front of the bike.
Is a riser block necessary for short rides?
Even on shorter rides, the correct riding position reduces strain. However, the benefits become more noticeable during sessions lasting 45 minutes or longer. That said, developing the habit of using one from the start is a smart approach regardless of ride length.