
Indoor cycling trainers have revolutionized how cyclists maintain fitness during challenging weather conditions. These devices allow you to transform your road bike into a stationary training machine right in your home. However, safety should always come first when setting up and using these trainers. This comprehensive guide will walk you through everything you need to know about using an indoor trainer safely and effectively.
Understanding Indoor Cycling Trainers
Indoor trainers come in several varieties, each offering unique benefits. The most common types include wheel-on trainers, direct-drive trainers, and roller trainers. Wheel-on trainers are the most affordable option and work by pressing a resistance unit against your rear tire. Direct-drive trainers replace your rear wheel entirely, connecting directly to your bike’s drivetrain. Roller trainers require more balance and skill as your bike sits on top of rotating drums.
Each type has distinct advantages. Wheel-on trainers are budget-friendly and easy to set up. Direct-drive models provide the most realistic riding experience and reduce tire wear. Rollers improve balance and pedaling technique. Therefore, choosing the right trainer depends on your budget, space, and training goals.
Checking Road Bike Compatibility Before Purchase
Not all trainers work with every bicycle. Before investing in a trainer, you need to verify that your bike will fit properly. Most modern trainers accommodate standard frame sizes and wheel dimensions. However, certain bikes may require adapters or modifications.
Start by examining your bike’s rear axle. Most traditional bikes use a quick release skewer mechanism that allows easy wheel removal. This system typically works seamlessly with most trainer models. Nevertheless, newer bikes increasingly feature thru-axles instead, which require different mounting solutions.
Additionally, check your wheel size. Most trainers support 700c wheels, which are standard on road bikes. Some models also accommodate 650b or 26-inch wheels. The manufacturer’s specifications will list compatible wheel sizes clearly.
Frame spacing matters too. Measure the distance between your rear dropouts. Standard road bikes typically have 130mm spacing, while some newer models use 135mm or 142mm. Matching this measurement ensures proper alignment and prevents frame damage.
Preparing Your Bike for Trainer Use
Proper preparation protects both your bike and your safety. Start by giving your bike a thorough inspection. Check for loose bolts, worn components, or any damage that could worsen during stationary riding. Indoor training often involves intense efforts, so everything must be secure.
Clean your bike thoroughly, especially the drivetrain. Indoor riding kicks up less dirt, but starting with a clean bike prevents unnecessary wear. Additionally, consider using an old tire on your rear wheel if you have a wheel-on trainer. The friction from the resistance unit will wear down your tire faster than road riding.
Installing your bike correctly is crucial. For wheel-on trainers, ensure the resistance unit contacts your tire firmly but not excessively. Too much pressure causes unnecessary wear, while too little results in slippage. Most trainers include adjustment mechanisms to dial in the perfect tension.
For direct-drive trainers, removing your rear wheel requires care. Shift into your smallest rear cog before removal. This position makes reinstallation easier and reduces chain tension. When mounting the bike onto the trainer, ensure the cassette alignment is perfect. Misalignment causes poor shifting and potential drivetrain damage.
The quick release skewer that comes with your trainer deserves special attention. Many trainers include a specific skewer designed for their system. Use this provided skewer rather than your bike’s original one. These trainer-specific skewers often have different threading or length to ensure proper clamping force.
Creating a Safe Training Environment
Your training space significantly impacts safety and comfort. Choose a level, stable surface for your trainer. Concrete floors in garages or basements work well. If you must use carpet, place a training mat underneath. These mats protect flooring, reduce noise, and catch sweat that could damage surfaces below.
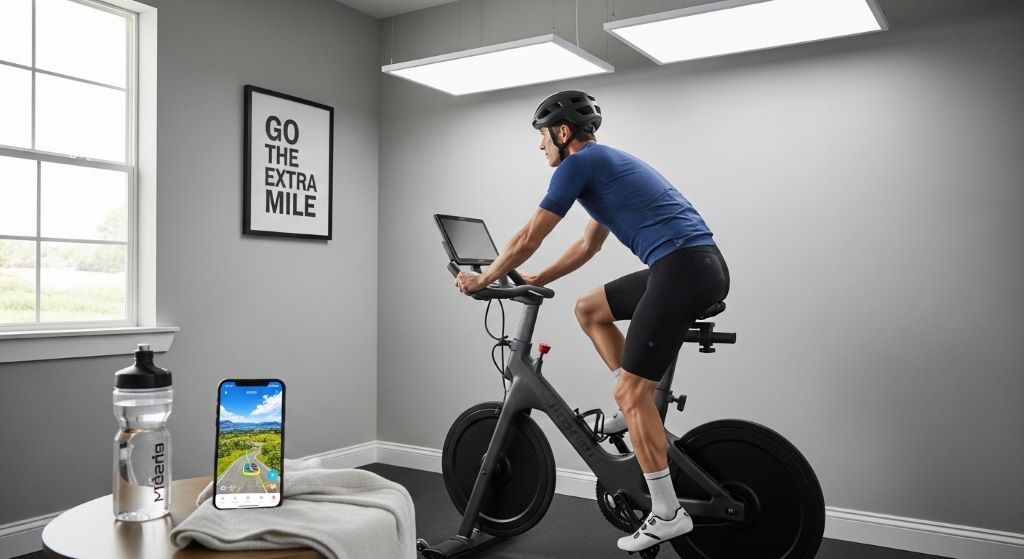
Ventilation is essential. Indoor cycling generates tremendous heat, and poor airflow leads to overheating and discomfort. Position a fan directly in front of you. Many cyclists use multiple fans to simulate outdoor air movement. Proper cooling improves performance and prevents dizziness or nausea.
Protect your bike from sweat damage. Sweat is incredibly corrosive and can ruin components quickly. Place a sweat guard over your top tube and handlebars. These inexpensive covers absorb moisture before it reaches your bike. Additionally, wipe down your bike after every session.
Keep water within easy reach. Dehydration happens faster indoors than on outdoor rides. Set up multiple water bottles before starting. Some cyclists prefer electrolyte drinks for longer sessions. Hydration prevents cramping and maintains performance.
Consider your lighting carefully. You need adequate visibility to monitor screens or read training programs. However, avoid harsh overhead lights that cause glare on computer screens or tablets. Side lighting or indirect lighting works best.
Mounting and Dismounting Safely
Getting on and off your trainer-mounted bike requires attention. The bike is more stable than you might expect, but it cannot move laterally. Therefore, mount carefully to avoid tipping.
Before mounting, ensure the trainer’s feet are firmly planted. Some trainers include adjustable feet for leveling. Use these to eliminate any wobble. A stable trainer prevents accidents during intense efforts.
When mounting, position yourself beside the bike as you would outdoors. Hold the handlebars firmly, then swing your leg over. Unlike outdoor riding, you cannot coast forward, so be prepared for the bike to remain stationary. Some beginners find this disconcerting at first.
Start pedaling immediately after mounting. The resistance keeps you stable. If you pause while mounted, maintain a good grip on the handlebars. The bike will not fall forward or backward, but it could tip sideways without support.
Dismounting requires equal care. Slow your pedaling gradually. Avoid sudden stops, especially during high-resistance intervals. Once you are ready to dismount, unclip one foot while holding the handlebars firmly. Step down carefully and support the bike as you swing your leg over.
Adjusting Resistance and Intensity Safely
Start every session with a proper warmup. Cold muscles and tendons are more prone to injury. Spend at least ten minutes pedaling at low resistance. This preparation increases blood flow and prepares your body for harder efforts.
Gradually increase resistance during your warmup. Sudden jumps in difficulty can strain muscles or cause cramping. Most trainers allow precise resistance control through connected apps or manual adjustments. Use this feature to create smooth progressions.
During intense intervals, maintain good form. The stationary nature of indoor training can encourage poor posture. Keep your shoulders relaxed, elbows slightly bent, and core engaged. Proper form prevents back pain and overuse injuries.
Listen to your body carefully. Indoor training often feels harder than outdoor riding because you cannot coast. There are no descents or stops to provide recovery. Consequently, you may fatigue faster than expected. Adjust your workout if you feel excessively tired or experience pain.
Cool down properly at the end of each session. Spend five to ten minutes spinning at low resistance. This cooldown helps remove metabolic waste from your muscles and prevents stiffness. Additionally, it gradually reduces your heart rate.
Maintaining Your Equipment
Regular maintenance keeps your trainer and bike safe and functional. After each use, wipe down your bike to remove sweat. Pay special attention to metal components, which corrode quickly. A simple towel wipe takes seconds but extends your equipment’s life significantly.
Inspect your trainer regularly. Check for loose bolts, worn pads, or damaged components. Tighten any loose hardware immediately. Most trainers require minimal maintenance, but neglect can lead to failures during use.
For wheel-on trainers, monitor your tire wear. The resistance unit creates friction that degrades rubber faster than road riding. Replace worn tires promptly. A tire failure during an intense interval could cause a crash.
Keep your drivetrain clean and lubricated. Indoor riding keeps your bike cleaner than outdoor cycling, but you still need regular chain maintenance. A clean chain runs quietly and shifts smoothly. Moreover, it lasts longer and prevents premature wear on other components.
Check the quick release skewer periodically. Ensure it maintains proper tension and shows no signs of wear. A failing skewer could allow your bike to slip from the trainer during use. Replace worn skewers immediately.
Avoiding Common Safety Mistakes
Many cyclists make predictable errors when starting indoor training. Learning from others’ mistakes helps you avoid injury or equipment damage. One common error is training too intensely too soon. Indoor training feels different from outdoor riding. Start conservatively and build gradually.
Another frequent mistake involves inadequate cooling. Cyclists often underestimate how much they sweat indoors. Without proper ventilation, core temperature rises dangerously. Always use fans, even during easy sessions.
Some riders neglect proper bike setup. They mount their bike incorrectly or skip important adjustments. Take time to ensure everything is perfect before starting. A few extra minutes of setup prevents hours of frustration or potential injury.
Ignoring pain signals represents another serious error. Indoor training can mask overuse injuries because the consistent resistance eliminates the natural variability of outdoor riding. If something hurts, stop and investigate. Pushing through pain often worsens injuries.
Finally, many cyclists forget to stay hydrated. The focused nature of indoor training distracts from thirst signals. Set reminders if necessary. Proper hydration is crucial for safety and performance.
Enhancing Your Training Experience
While safety comes first, you can make indoor training more enjoyable. Many cyclists use training apps that provide virtual routes, structured workouts, and social interaction. These platforms make sessions more engaging and help maintain motivation.
Entertainment options help pass time during longer sessions. Music, podcasts, or streaming services make training more pleasant. However, keep volume at levels that allow you to hear unusual sounds from your bike or trainer. Strange noises often signal mechanical problems requiring attention.
Track your progress systematically. Recording your workouts helps you see improvement and adjust training loads appropriately. Most training apps include built-in tracking, but simple notebooks work too. Monitoring progress keeps you motivated and helps prevent overtraining.
Consider joining virtual group rides or races. Many platforms offer real-time events where you ride alongside cyclists worldwide. These social experiences replicate the camaraderie of outdoor group rides. Furthermore, they provide accountability and motivation.
Set realistic goals for indoor training. Understanding that indoor sessions differ from outdoor rides helps manage expectations. Many coaches recommend reducing indoor workout duration compared to equivalent outdoor sessions. The increased intensity of continuous pedaling makes shorter workouts equally effective.
Conclusion
Using an indoor cycling trainer safely requires attention to setup, environment, and maintenance. By ensuring proper road bike compatibility and correctly installing components like the quick release skewer, you create a stable foundation for training. Regular equipment inspections, appropriate resistance progression, and adequate cooling protect your health and equipment. Remember that indoor training differs from outdoor cycling, requiring modified expectations and careful attention to form. With proper preparation and consistent safety practices, indoor training becomes an effective and enjoyable way to maintain fitness year-round. Take time to set up correctly, listen to your body, and maintain your equipment regularly for the best experience.
Frequently Asked Questions
What type of indoor trainer is safest for beginners?
Wheel-on trainers are generally safest for beginners because they are simple to set up and provide stable support. Direct-drive trainers offer excellent stability too, but they require more setup knowledge. Avoid rollers initially, as they demand significant balance skills and present higher fall risk.
How often should I check my trainer setup for safety?
Inspect your trainer setup before every ride. This quick check takes only a minute but prevents accidents. Look for loose connections, proper alignment, and secure mounting. Additionally, perform a thorough inspection weekly, examining all bolts and checking for wear.
Can I use my regular wheels on a wheel-on trainer?
You can use regular wheels, but consider dedicating an old tire for trainer use. The resistance unit wears tires faster than road riding. Using a dedicated trainer tire prevents premature wear on your good tires and reduces noise during training sessions.
How do I know if my bike frame is compatible with my trainer?
Check the trainer manufacturer’s specifications for compatible frame spacing and axle types. Most modern trainers accommodate standard road bike dimensions. If your bike has unusual specifications, contact the manufacturer directly. They can advise on adapters or alternative mounting solutions.
What should I do if my bike feels unstable on the trainer?
First, verify that the trainer sits level on a stable surface. Check that all mounting points are tight and properly aligned. Ensure you are using the correct skewer and that it is adequately tensioned. If instability persists, contact the trainer manufacturer for troubleshooting assistance.
Related Topics:
The Ultimate Guide to Fixed Gear Bike Maintenance for Urban Commuting
How Protective Skate Pads Absorb Impact During Falls