
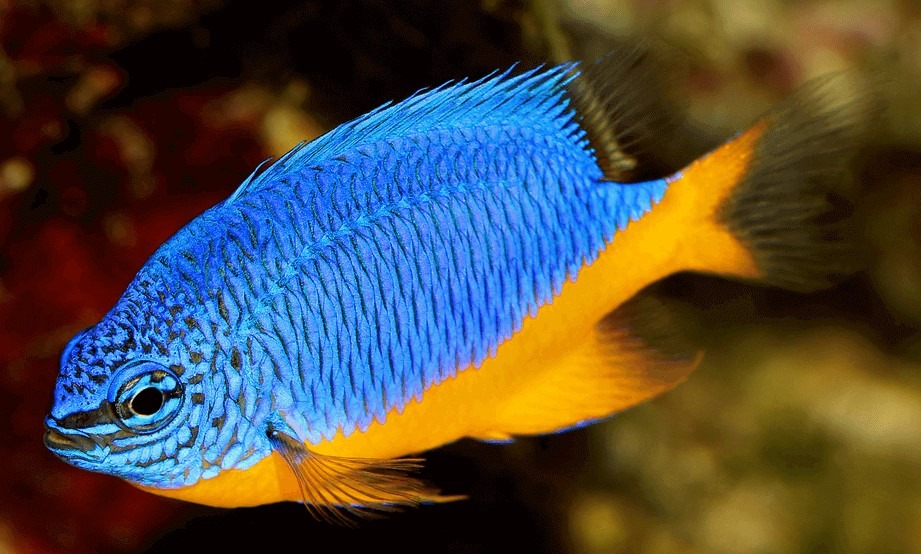
A vibrant saltwater aquarium, brimming with colorful and active fish, is a stunning centerpiece for any home. The allure of fish like an Emperor Angelfish or a Picasso Triggerfish is undeniable. However, many new hobbyists feel intimidated by the maintenance. The ocean is a vast, stable environment, and replicating that stability in a glass box seems complex. The good news is that success is not about complex chemistry; it is about consistency. With a simple, repeatable schedule, anyone can maintain a healthy and beautiful aquarium. Great resources like the Reef Aquarium Blog can be invaluable guides on this journey.
This article will provide a clear, comprehensive maintenance schedule. We will break down the necessary tasks into daily, weekly, and monthly checklists. Following this guide will remove the guesswork, prevent common problems, and ensure your fish thrive for years to come.
Before we dive in, it is important to clarify what we are discussing. This guide is specifically for fish-only (FO) or FOWLR (Fish Only With Live Rock) aquariums. Unlike reef tanks, these setups do not contain delicate corals. This distinction is important because the maintenance, lighting, and water parameter goals are different. A stable saltwater fish only tank is often more forgiving, allowing you to focus on the health and personality of your fish.
The Importance of a Consistent Maintenance Schedule
Why is a strict schedule so important? A saltwater fish only tank is a closed ecosystem. In the wild ocean, waste products are diluted by trillions of gallons of water. In your living room, those same waste products build up quickly.
Every time you feed your fish, they produce waste in the form of ammonia. Beneficial bacteria (your biological filter, often living in live rock or other bio-media) convert this toxic ammonia into nitrite, and then into nitrate. While nitrate is much less toxic to fish, it is not harmless. In high concentrations, nitrate can still cause stress, suppress immune systems, and lead to health problems.
Furthermore, fish consume trace elements and buffers in the water, which affects the water’s pH and alkalinity. Without regular replenishment, the water chemistry can drift into dangerous territory.
A consistent maintenance schedule addresses all of this. It accomplishes three primary goals:
- Waste Removal: It removes nitrates and phosphates before they reach harmful levels.
- Stability: It replenishes essential elements and buffers, keeping the pH and alkalinity stable.
- Prevention: It allows you to catch equipment failures or fish health issues before they become disasters.
This schedule is your key to long-term success.
Your Daily 10-Minute Check-In
This is not a chore; it is a 10-minute visual inspection. The best times to do this are during feeding, as all your fish will be front and center.
-
Observe Your Fish
This is your most important daily task. Look at every fish in the tank.
- Are they behaving normally? Look for fish hiding who are usually active, or fish acting aggressively.
- Are they breathing normally? Rapid breathing (gilling) can signal stress, low oxygen, or a health problem.
- Do they have any physical marks? Check for white spots (like salt grains, a sign of Ich), torn fins (a sign of fighting), or red patches.
- Is everyone eating? A fish that suddenly stops eating is almost always a sign that something is wrong.
-
Check Key Equipment
You do not need to take anything apart. This is a simple visual and audible check.
- Water Flow: Are the pumps and powerheads all running? Is water visibly returning from your sump or filter?
- Temperature: Look at your thermometer. Is the temperature in the stable range you have set (usually 75-78°F or 24-26°C)?
- Protein Skimmer: Is the skimmer producing foam? Is the collection cup getting full? If it is full, empty it.
- Listen: Are there any new, strange sounds? A rattling or grinding noise can mean a pump is failing or needs cleaning.
-
Quick Cleanup
- Wipe the Glass: If you see a tiny bit of algae, wipe it now with an algae magnet. It takes 30 seconds.
- Check for “Salt Creep”: As saltwater splashes and evaporates, it leaves a crusty salt residue. Wipe any salt creep off the tank rim, lights, and cords. Salt creep is corrosive and can damage equipment.
- Top-Off Water: Check the level of your freshwater reservoir for your Auto Top-Off (ATO) system. If you do not have an ATO, you will need to manually add fresh, RODI (Reverse Osmosis Deionized) water to replace what has evaporated. Remember, salt does not evaporate, only the water does.

The Weekly Maintenance Tasks
This is your most significant maintenance session of the week. Set aside an hour on the same day each week. This is where you will perform your water tests and the all-important water change.
-
Water Testing: Your Tank’s Report Card
Before you do anything else, test your water. This tells you what has happened over the last week and confirms if your maintenance routine is working. For a saltwater fish only tank, you must test:
- Salinity (Specific Gravity): This should be rock-solid stable, ideally at 1.025. Use a refractometer or quality hydrometer.
- Ammonia: This should always be zero. Any reading above zero is an emergency.
- Nitrite: This should always be zero. Any reading indicates a problem with your biological filter.
- Nitrate: This is the key parameter you are managing. In a fish-only tank, a reading under 40 ppm (parts per million) is generally acceptable, but lower (under 20 ppm) is even better.
- pH: This measures the acidity of your water. You want a stable reading between 8.1 and 8.3.
-
The 15-20% Water Change
This is the single most effective way to maintain a healthy fish-only tank. It removes nitrates and replenishes trace elements.
Preparation: You must prepare your new saltwater at least 24 hours in advance.
- Fill a clean, fish-safe container (like a 5-gallon bucket or Brute trash can) with RODI water. Tap water contains chlorine, heavy metals, and other impurities and should not be used.
- Add a small powerhead or airstone to the water to circulate it.
- Add a small aquarium heater and bring the water up to the same temperature as your display tank.
- Add your chosen salt mix according to the manufacturer’s instructions. Let it mix thoroughly for at least a few hours, or ideally, overnight.
- Before you use it, test the salinity to make sure it matches your tank.
The Process:
- Turn off your pumps, powerheads, and heater.
- Use an algae scraper to clean all interior glass panels. Do this before you remove water, so you can siphon out the floating algae debris.
- Use an aquarium siphon (or “gravel vacuum”) to remove 15-20% of the tank’s water.
- As you siphon, move the siphon tube through the top layer of your sand bed. This removes fish waste, uneaten food, and other detritus. Do not “deep clean” the entire sandbed, as this can disrupt your beneficial bacteria.
- Once the water is removed, slowly add the new, pre-mixed saltwater back into the tank. Try not to pour it directly onto any fish or invertebrates.
- Turn all your equipment back on.
-
Weekly Equipment and Sump Cleaning
- Empty and Clean the Protein Skimmer Cup: This is vital. A full or dirty skimmer neck stops the skimmer from working effectively. Rinse the cup and neck thoroughly.
- Change Filter Socks: If you use filter socks, replace the dirty one with a clean one. You can wash the dirty ones in a washing machine (with a small amount of bleach, no soap) and reuse them.
- Rinse Filter Sponges: If you use mechanical filter sponges, rinse them in the old tank water you just siphoned out. Never rinse them in tap water, as the chlorine will kill the beneficial bacteria living in them.
The Monthly Maintenance Deep Dive
Once a month, you will expand on your weekly tasks to service your equipment. This ensures everything runs at peak efficiency.
-
Service Your Equipment
Pumps, powerheads, and skimmers get clogged over time with algae, bacterial slime, and calcium buildup (coralline algae).
- Clean Powerheads and Pumps: Take your main return pump and all in-tank powerheads apart. Remove the impeller and scrub the inside of the pump and the impeller itself with a small brush. For stubborn calcium buildup, you may need to soak the parts in a 50/50 solution of vinegar and water for 30 minutes. Rinse them thoroughly in fresh water before returning them to the tank.
- Deep Clean the Protein Skimmer: At least once a month, take the entire skimmer body apart and clean it. This ensures the air injectors and bubble plates are free of salt and calcium buildup, allowing the skimmer to produce the maximum amount of foam.
- Check Tubing and Plumbing: Make sure all tubing is secure and not clogged. Salt creep and algae can build up inside tubes, restricting flow.
-
Manage Your Filtration Media
- Replace Chemical Media: If you use media like activated carbon (to keep water clear) or GFO (to absorb phosphates), it needs to be replaced. These media become exhausted after 2-4 weeks. Follow the manufacturer’s instructions for the replacement schedule.
- Manage Biological Media: If you have bio-balls or ceramic rings in your sump, you should never replace them. However, once every few months, you can gently rinse a portion of them in old tank water to remove any built-up detritus. Never clean all of them at once.
-
General Organization
- Check Supplies: Check your inventory. Are you running low on salt, food, or test kit reagents?
- Test Kit Expiration: Check the expiration dates on your test kits. Expired kits will give you false readings.
- Organize Your Wires: This is a good time for safety. Check for any salt spray on power strips and organize your cords with zip ties to create “drip loops” (where the cord dips down before plugging in), preventing water from running down the cord into the electrical outlet.
Conclusion: The Secret is Consistency
This schedule may look like a lot of text, but the tasks themselves are simple. The daily check takes 10 minutes. The weekly work takes about an hour. The monthly tasks just add another 30-60 minutes to your weekly routine.
The reward for this consistency is a stable, healthy, and stunning saltwater fish only tank. By preventing problems before they start, you spend less time troubleshooting and more time enjoying the beautiful slice of the ocean you have created in your home. This schedule is a framework; you may find you need to tweak it based on your specific tank’s bioload. However, if you stick to this daily, weekly, and monthly rhythm, you are well on your way to becoming a successful saltwater aquarist.
Frequently Asked Questions
-
How much water should I change in my saltwater fish only tank?
For most fish-only or FOWLR tanks, a weekly water change of 15-20% is ideal. If your tank is heavily stocked (many large fish), you may need to increase this to 25% or perform a 15% change twice a week. Your nitrate test will be your best guide.
-
Do I really need a protein skimmer for a fish-only tank?
While you can run a fish-only tank without one, it is highly recommended. A protein skimmer removes organic waste before it breaks down into nitrate. This means less nitrate buildup, cleaner water, and a reduced load on your biological filter. It makes your maintenance easier and provides a significant safety buffer.
-
How often should I test my water parameters?
When your tank is new (cycling), you should test ammonia, nitrite, and nitrate daily. Once the tank is established and stable, you should test nitrate, pH, and salinity weekly, just before your water change. Ammonia and nitrite should also be tested weekly, or immediately if any fish look sick or stressed.
-
What is FOWLR (Fish Only With Live Rock)?
FOWLR stands for “Fish Only With Live Rock.” This is the most popular type of saltwater fish only tank. Instead of plastic decorations, the tank is aquascaped with “live rock,” which is porous rock colonized by beneficial bacteria and other micro-organisms. The live rock functions as the tank’s primary biological filter.
-
Can I use tap water for my saltwater tank?
It is strongly advised not to use tap water. Tap water contains chlorine or chloramine (which is toxic to fish), as well as nitrates, phosphates, and heavy metals. These substances can fuel massive algae outbreaks and harm your fish. You should always use Reverse Osmosis Deionized (RODI) water for both mixing new salt and topping off for evaporation.
Related Topics:
Hidden Car Storage Compartments You Didn’t Know Existed
How to Make a Hydroponic Herb Garden: A Comprehensive Guide for Fresh Herbs Year-Round