The Surprising Truth About Luffa Sponges
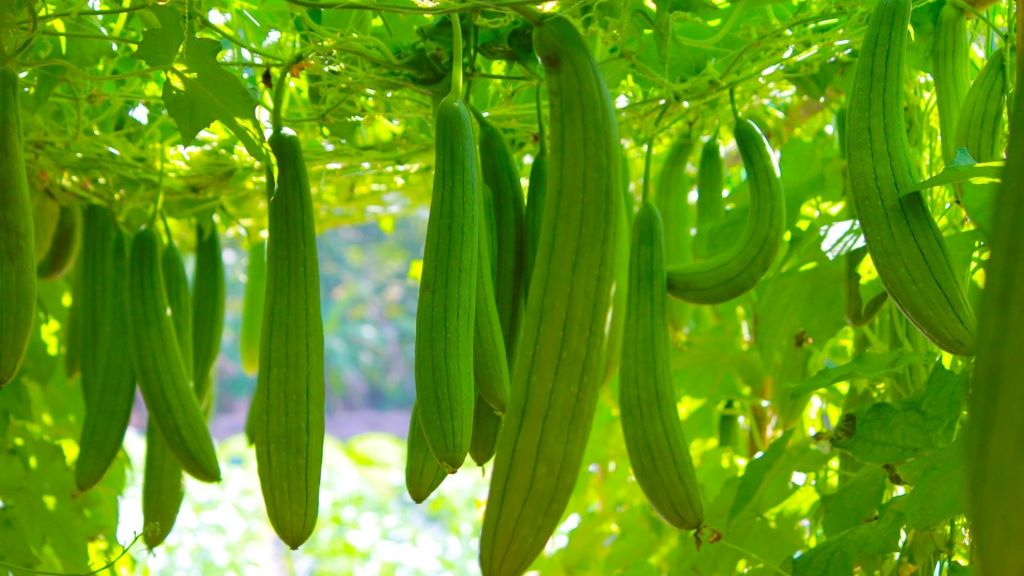
Did you know that the luffa sponge you use in the shower isn’t a sea creature but a plant you can grow in your own backyard? Luffa (also spelled loofah) is a tropical vine that produces fibrous gourds, which, when dried, become the natural sponges found in stores. Growing luffa sponges is not only rewarding but also sustainable, as they replace synthetic bath and cleaning sponges.
In this guide, we’ll walk you through everything you need to know about how to grow and harvest luffa sponges, from seed selection to curing the final product. Whether you’re a seasoned gardener or a beginner, you’ll find practical tips to ensure a successful harvest.
Why Grow Your Own Luffa Sponges?
Before diving into the growing process, let’s explore why luffa sponges are worth the effort:
- Eco-Friendly – Unlike plastic sponges, luffas are 100% biodegradable.
- Cost-Effective – A single plant can produce multiple sponges, saving money over time.
- Versatile Uses – Great for exfoliating skin, scrubbing dishes, and even as sustainable craft material.
- Fun Gardening Project – Watching luffa vines grow and produce giant gourds is incredibly satisfying.
Now, let’s get into the step-by-step process of growing and harvesting your own luffa sponges.
Step 1: Choosing the Right Luffa Variety
There are two main types of luffa plants:
- Luffa aegyptiaca (Smooth Luffa) – The most common variety for sponges, producing long, smooth gourds.
- Luffa acutangula (Angled Luffa) – Edible when young but less ideal for sponges due to ridges.
For sponge production, Luffa aegyptiaca is the best choice. Purchase seeds from a reputable supplier to ensure quality.
Step 2: Starting Luffa Seeds Indoors
Luffa plants require a long growing season (150-200 frost-free days), so starting seeds indoors is crucial in cooler climates.
How to Start Luffa Seeds:
- When to Plant: Start seeds 6-8 weeks before the last frost date.
- Seed Preparation: Soak seeds in warm water for 24 hours to improve germination.
- Planting Depth: Sow seeds ½ inch deep in seed-starting mix.
- Germination Conditions: Keep soil warm (75-85°F) and moist. Seeds sprout in 7-14 days.
- Light Requirements: Provide 12-16 hours of light daily (grow lights work best).
Once seedlings have 2-3 true leaves, they’re ready for transplanting.
Step 3: Transplanting Luffa Seedlings Outdoors
Luffa plants thrive in full sun (6-8+ hours daily) and well-draining soil. Follow these steps for successful transplanting:
Best Time to Transplant:
- Wait until night temperatures stay above 50°F.
- Harden off seedlings for 7-10 days before planting.
Soil Preparation:
- Luffas prefer fertile, loamy soil with a pH of 6.0-6.5.
- Amend soil with compost or aged manure for nutrients.
Spacing & Support:
- Plant seedlings 3-4 feet apart (vines can grow 20-30 feet long!).
- Provide a strong trellis or fence—luffas climb vigorously, and hanging gourds develop straighter shapes.

Step 4: Caring for Luffa Plants
Watering:
- Keep soil consistently moist (1-2 inches of water per week).
- Avoid overhead watering to prevent mildew.
Fertilizing:
- Use a balanced fertilizer (10-10-10) at planting.
- Switch to a high-potassium fertilizer once flowering begins.
Pest & Disease Management:
- Common Pests: Aphids, cucumber beetles, squash bugs.
- Organic Solutions: Neem oil, insecticidal soap, or hand-picking.
- Diseases: Powdery mildew (prevent with good airflow).
Step 5: Pollinating Luffa Flowers
Luffa plants produce male and female flowers. To ensure good fruit set:
- Hand Pollination: Use a small brush to transfer pollen from male to female flowers (females have a tiny fruit at the base).
- Attract Pollinators: Plant flowers like marigolds nearby to encourage bees.
Step 6: When and How to Harvest Luffa Gourds
Signs Your Luffas Are Ready to Harvest:
- Gourds turn from green to yellow or brown.
- Skin feels dry and lightweight.
- You can hear seeds rattling inside when shaken.
Harvesting Steps:
- Use pruners to cut gourds from the vine, leaving a few inches of stem.
- If frost is coming, harvest early and let them dry indoors.
Step 7: Processing Luffa Gourds into Sponges
Peeling & Cleaning:
- Soak gourds in water for 24 hours to soften the skin.
- Peel off the outer skin—it should come off easily.
- Shake out seeds (save some for next year!).
- Rinse the fibrous interior under running water to remove sap.
Bleaching (Optional):
- Soak luffas in a 10% bleach solution (1 part bleach to 9 parts water) for 10-15 minutes to whiten them.
- Rinse thoroughly and dry in the sun.
Drying & Storing:
- Hang luffas in a well-ventilated area until completely dry.
- Store in a cool, dry place to prevent mold.
Creative Uses for Homegrown Luffa Sponges
Beyond bathing, luffas can be used for:
- Eco-friendly dish scrubbers
- Homemade soap exfoliators
- Natural pot scrubbers
- Craft projects (plant ties, biodegradable packaging)
Frequently Asked Questions (FAQs)
- Can I grow luffas in containers?
Yes! Use a large pot (10+ gallons) and a sturdy trellis.
- How long does it take to grow a luffa sponge?
From seed to harvest, expect 4-6 months.
- Are luffa sponges sanitary?
Yes! They’re naturally antimicrobial when properly dried and cleaned.
- Can you eat luffa gourds?
Only when harvested young (under 6 inches). Mature gourds are too fibrous.
Conclusion: Start Growing Your Own Luffa Sponges Today!
Growing luffa sponges is a fun, sustainable gardening project that rewards you with versatile, chemical-free sponges. With the right care—proper sunlight, support, and patience—you’ll enjoy a bountiful harvest.
Read More:
How to Light a Living Room with No Overhead Lighting