

Dyeing fabric at home can transform your wardrobe and give new life to old clothes. However, the biggest challenge many people face is keeping those vibrant colors from fading after just a few washes. The secret to long-lasting color lies in proper heat-fixing techniques. Whether you’re a beginner or an experienced crafter, understanding these methods will help you achieve professional results. According to experts at Gett In Cool, mastering heat-fixing is essential for anyone serious about fabric dyeing.
Heat-fixing works by bonding dye molecules to fabric fibers through the application of heat. This process makes the color permanent and wash-resistant. Different fabrics and dye types require specific heat-fixing methods. Therefore, choosing the right technique for your project is crucial. If you want to learn how to dye clothes permanently, understanding heat-fixing is your first step toward success.
Additionally, proper heat-fixing prevents color bleeding, maintains fabric integrity, and ensures your dyed items look fresh for years. Many people skip this step or do it incorrectly, which leads to disappointing results. However, with the right knowledge and tools, anyone can master these techniques at home.
Understanding the science behind heat-fixing
Heat-fixing works by opening up the fabric fibers and allowing dye molecules to penetrate deeply. When heat is applied, the fibers expand and the dye bonds chemically with the material. Once the fabric cools, the fibers contract and trap the dye inside. This process creates a permanent bond that resists fading and washing.
Different dyes require different temperatures for proper fixing. Fiber-reactive dyes typically need lower heat, while acid dyes for wool and silk require higher temperatures. Natural dyes often need moderate heat combined with mordants for lasting results. Understanding your dye type helps you choose the correct heat-fixing method.
Moreover, the fabric type plays a crucial role in heat-fixing success. Cotton and linen respond well to high heat, while synthetic fabrics may melt or damage at high temperatures. Silk and wool need gentle heat to avoid fiber damage. Always check your fabric content before selecting a heat-fixing method.
Iron heat-fixing method
The iron method is the most accessible heat-fixing technique for home dyers. This method works exceptionally well for small projects and flat items like scarves, pillowcases, and t-shirts. First, allow your dyed fabric to dry completely after rinsing out excess dye. Any remaining moisture can interfere with the heat-fixing process.
Next, place your dried fabric on an ironing board. Cover it with a clean pressing cloth or piece of parchment paper to protect both the fabric and your iron. Set your iron to the highest temperature safe for your fabric type. Cotton can handle high heat, while silk needs medium settings.
Press the iron firmly onto the fabric and hold it in place for 30 seconds to one minute. Move systematically across the entire dyed area, ensuring every section receives adequate heat. The fabric should feel very hot to the touch after pressing. Repeat this process on the reverse side for thorough fixing.
However, avoid sliding the iron back and forth, as this can smudge freshly fixed dye. Instead, lift and press in overlapping sections. This technique ensures even heat distribution and prevents color distortion. According to textile experts at The Spruce Crafts, proper ironing technique can make dyed colors last through hundreds of washes.
Oven heat-fixing technique
Oven heat-fixing provides consistent, all-around heat that’s perfect for three-dimensional items. This method works beautifully for dyed clothing, bags, and other garments that are difficult to iron flat. Preheat your oven to 300 degrees Fahrenheit for most natural fibers.
Wrap your completely dry dyed item in aluminum foil. This protects the fabric from direct heat and ensures even temperature distribution. Place the wrapped item on a baking sheet in the center of the oven. Set a timer for 20 to 30 minutes, depending on the fabric weight.
Check the item halfway through to ensure it’s not overheating. Thicker fabrics may need the full 30 minutes, while lightweight materials might only need 15 minutes. The fabric should feel hot throughout when you remove it from the oven.
Additionally, this method allows you to heat-fix multiple items simultaneously. Just ensure they don’t touch each other inside the foil wrapping. Let items cool completely before unwrapping to prevent color transfer. Never use this method for fabrics containing synthetic fibers that might melt.
Dryer heat-fixing approach
The clothes dryer offers a convenient heat-fixing method for larger batches of dyed fabric. This technique works well for fiber-reactive dyes on cotton and linen. First, make sure your dyed items are completely dry before placing them in the dryer. Damp fabric won’t fix properly.
Set your dryer to the highest heat setting safe for your fabric. Add the dyed items and run the dryer for 30 to 45 minutes. The tumbling action combined with sustained heat helps set the dye evenly. Furthermore, this method is ideal for items like sheets, tablecloths, and multiple garments.
Keep in mind that this method uses more energy than ironing or steaming. However, it saves time when working with large quantities. Always check fabric care labels before using high heat. Some fabrics may shrink or damage in high-heat drying.
Moreover, you can add clean towels to the dryer load to help absorb any excess moisture and improve heat circulation. Just ensure the towels are color-safe and won’t bleed onto your freshly dyed items.
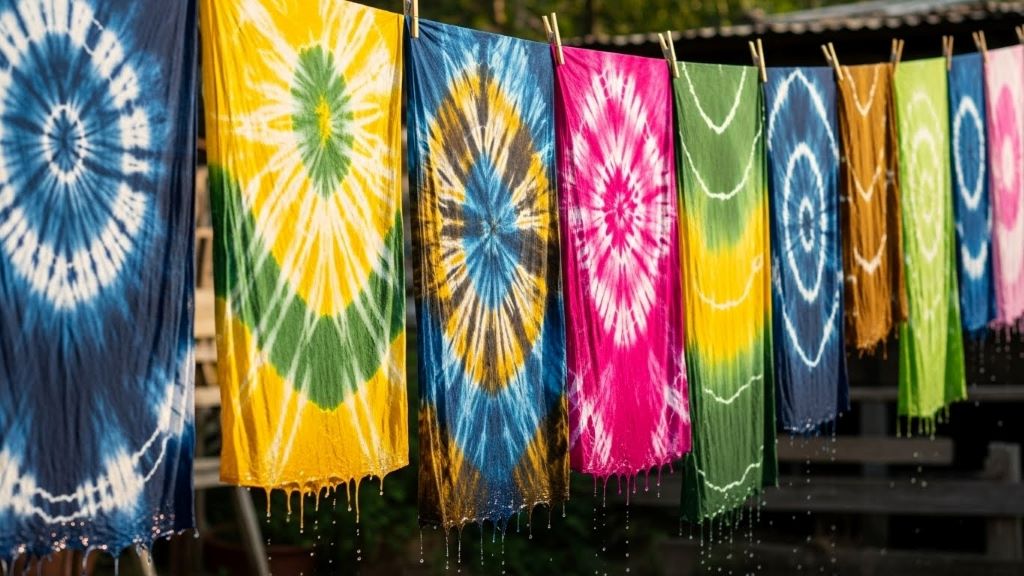
Steam heat-fixing method
Steam heat-fixing is the gentlest method and works perfectly for delicate fabrics like silk, wool, and rayon. This technique uses moist heat rather than dry heat, which prevents fiber damage. You’ll need a garment steamer or a pot of boiling water for this method.
Hold your steamer about two inches away from the dyed fabric surface. Move it slowly across the entire dyed area, allowing steam to penetrate the fibers. Continue for five to ten minutes per item. The fabric should feel warm and slightly damp from the steam.
Alternatively, you can suspend the dyed item over a pot of boiling water. Use a hanger or rod to hold the fabric above the steam without touching the water. Let steam rise through the fabric for 15 to 20 minutes. This method requires careful attention to avoid burning yourself or dropping the fabric.
Therefore, steam fixing is ideal for items that can’t withstand direct heat or pressure. It’s particularly effective for naturally dyed fabrics that need gentle treatment. However, steam fixing may take longer than other methods and requires more attention during the process.
Microwave heat-fixing for small projects
Microwave heat-fixing is a quick solution for small items like fabric swatches, ribbons, or craft projects. This method works best for natural fibers and fiber-reactive dyes. Place your damp dyed item in a microwave-safe container or wrap it in plastic wrap.
Microwave on high for two to three minutes, checking every 30 seconds to prevent overheating. The fabric should steam and become very hot but not dry out completely. Let it cool for a few minutes before unwrapping. This rapid heating creates the same dye-fixing effect as other methods.
However, this technique has limitations. It only works for small pieces that fit safely in your microwave. Never use metallic mordants or dyes containing metal particles, as these can cause sparks. Additionally, synthetic fabrics should never be microwaved as they may melt or catch fire.
Tips for successful heat-fixing
Timing matters significantly in heat-fixing. Apply heat as soon as possible after dyeing for best results. The longer dye sits without heat-fixing, the less permanent it becomes. Most experts recommend heat-fixing within 24 hours of dyeing.
Always work with completely dry fabric unless using the steam method. Moisture can interfere with proper dye bonding and may cause uneven color setting. Test your heat-fixing method on a fabric scrap first, especially when working with expensive or sentimental materials.
Furthermore, adequate ventilation is important during heat-fixing. Some dyes release fumes when heated, so work in a well-ventilated area or outdoors when possible. Keep windows open and use fans to circulate air.
Patience yields better results than rushing the process. Don’t skip steps or reduce heating time to save minutes. Proper heat-fixing takes time but ensures your colors last for years. According to research published in textile science journals, properly heat-fixed fabrics maintain 90% of their color intensity even after 50 washes.
Post-heat-fixing care
After heat-fixing, let your fabric cool completely before washing. This cooling period allows the dye bonds to fully stabilize. Wait at least 24 hours before the first wash for optimal results. When you do wash, use cool water and mild detergent.
Wash newly dyed items separately for the first few washes. Even with proper heat-fixing, some excess dye may release initially. This precaution prevents color transfer to other garments. Add a cup of white vinegar to the rinse cycle to help seal color further.
Additionally, avoid harsh detergents and bleach on dyed fabrics. These chemicals can break down dye bonds over time and cause premature fading. Turn garments inside out before washing to protect the dyed surface from agitation.
Store dyed fabrics away from direct sunlight, which can fade colors regardless of heat-fixing quality. Fold items loosely rather than hanging them for extended periods, as hanging can cause stretching and uneven fading over time.
Conclusion
Heat-fixing transforms temporary fabric dye into permanent, vibrant color that withstands repeated washing and wear. Whether you choose ironing, oven heating, steaming, or dryer methods, proper technique ensures professional results. Each method has unique advantages depending on your fabric type, project size, and available equipment. Therefore, understanding these techniques empowers you to create beautiful, long-lasting dyed fabrics at home. Remember to match your heat-fixing method to your fabric and dye type, work with completely dry materials, and never rush the process. With patience and proper technique, your hand-dyed creations will maintain their brilliant colors for years to come.
Frequently Asked Questions
How long does heat-fixing take to complete?
Heat-fixing typically takes between 15 to 45 minutes depending on the method used. Ironing requires about 3 to 5 minutes per item, while oven and dryer methods need 20 to 30 minutes. However, cooling time should also be considered as part of the complete process.
Can I skip heat-fixing if I use high-quality dye?
No, heat-fixing is essential regardless of dye quality. Even premium dyes require heat activation to create permanent bonds with fabric fibers. Skipping this step results in colors that fade quickly and bleed during washing, wasting both time and materials.
What temperature should I use for heat-fixing cotton?
Cotton tolerates high temperatures well, so you can safely use 400 degrees Fahrenheit when ironing or 300 degrees in the oven. These high temperatures ensure complete dye bonding without damaging the natural fibers. Always use a pressing cloth when ironing to protect both fabric and iron.
Will heat-fixing damage delicate fabrics like silk?
Heat-fixing won’t damage silk when done correctly using appropriate methods. Steam heat-fixing is ideal for silk as it provides gentle, moist heat. Alternatively, use a medium iron setting with a pressing cloth. Avoid high direct heat and prolonged exposure to prevent fiber damage.
How do I know if my fabric is properly heat-fixed?
Properly heat-fixed fabric feels hot to the touch immediately after treatment and shows no color bleeding when washed in cool water. Test a small corner by rubbing it with a damp white cloth. If no color transfers, your heat-fixing was successful.
Related Topics:
How to Style a Triangle Body Shape: Key Tips for Flattering Outfits