
Cycling shoes represent a significant investment for any rider. Whether you’re a competitive racer or a weekend enthusiast, you want your footwear to deliver performance and comfort for as long as possible. With proper attention and regular upkeep, you can extend the lifespan of your cycling shoes significantly while maintaining their performance.
Most cyclists replace their shoes far sooner than necessary. Poor cleaning habits, improper storage, and neglecting small repairs contribute to premature wear. However, implementing a few simple practices can help you get years of reliable service from a quality pair of cycling shoes.
This comprehensive guide will walk you through everything you need to know about extending the life of your cycling footwear. You’ll discover practical techniques for cleaning, storage, maintenance, and minor repairs that keep your shoes performing at their best season after season.
Understanding What Damages Cycling Shoes
Before diving into preservation techniques, it’s helpful to understand what causes cycling shoes to deteriorate. Different factors contribute to wear and tear, and knowing these helps you take preventive action.
Moisture is perhaps the biggest enemy of cycling footwear. Sweat accumulates inside your shoes during every ride, creating a damp environment. This moisture breaks down adhesives, promotes bacterial growth, and can warp certain materials over time. Additionally, riding in wet conditions introduces external moisture that penetrates even water-resistant shoes.
Road grime and dirt act like sandpaper on your shoe’s materials. Fine particles work their way into fabric weaves, scratch synthetic surfaces, and clog ventilation systems. Over time, this abrasion weakens materials and compromises structural integrity.
UV exposure degrades synthetic materials and causes colors to fade. Leaving your shoes in direct sunlight or storing them near windows accelerates this deterioration. The materials become brittle and prone to cracking.
Mechanical stress from pedaling creates flex points that eventually wear out. The repeated motion of pushing down on pedals stresses specific areas of the shoe, particularly around the cleat mounting area and the upper where it meets the sole.
Cleaning Your Shoes After Every Ride
Establishing a post-ride cleaning routine is the single most effective way to maintain cycling shoes. This doesn’t need to be elaborate or time-consuming, but consistency makes a tremendous difference.
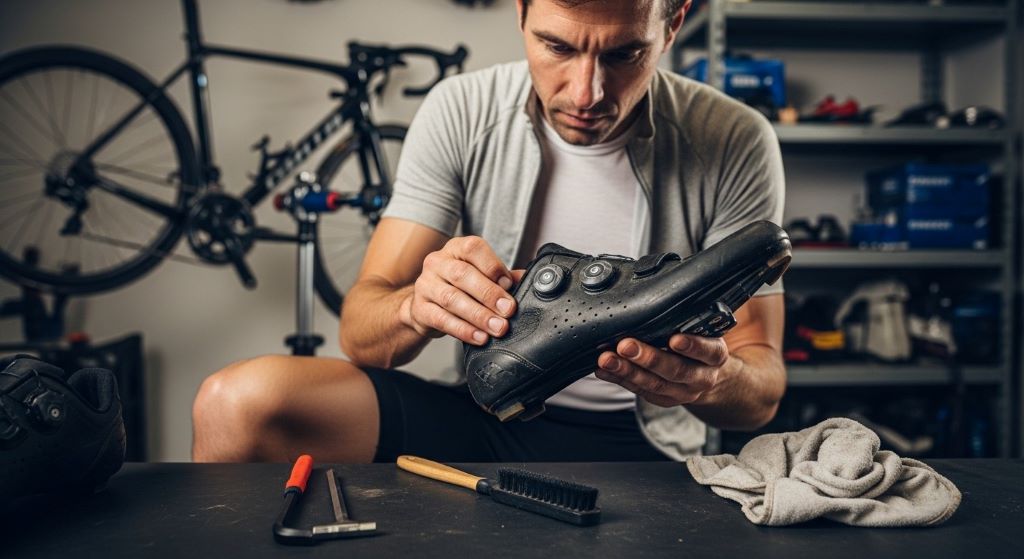
Start by removing any loose dirt immediately after your ride. Use a soft brush or dry cloth to wipe away mud, dust, and debris while it’s still relatively fresh. Dried mud becomes much harder to remove and can scratch surfaces during the cleaning process.
For the exterior, use lukewarm water and a mild soap solution. Avoid harsh detergents or chemical cleaners that can damage protective coatings and deteriorate synthetic materials. A soft sponge or cloth works better than stiff brushes that might scratch or scuff the surface.
Clean the cleat area thoroughly after each ride. Road debris and small stones often lodge in the cleat mechanism, potentially damaging both the cleat and the shoe. Use a small brush or toothpick to remove packed dirt from cleat grooves and mounting points.
Pay special attention to ventilation holes and mesh panels. These areas trap dirt and require careful cleaning to maintain breathability. A soft toothbrush works well for gently cleaning mesh without damaging the delicate material.
Wipe down buckles, straps, and closure systems. These components accumulate sweat and grime that can cause corrosion or mechanical failure. Clean the teeth on ratcheting buckles and inspect velcro straps for debris that reduces their grip.
Proper Drying Techniques
How you dry your cycling shoes after cleaning or wet rides dramatically impacts their longevity. Improper drying methods can warp materials, crack adhesives, and create odor problems.
Never use direct heat sources like radiators, hair dryers, or heaters. High heat breaks down adhesives that bond the sole to the upper, warps plastic components, and can shrink or damage synthetic materials. This temptation is especially strong after wet rides, but resist it.
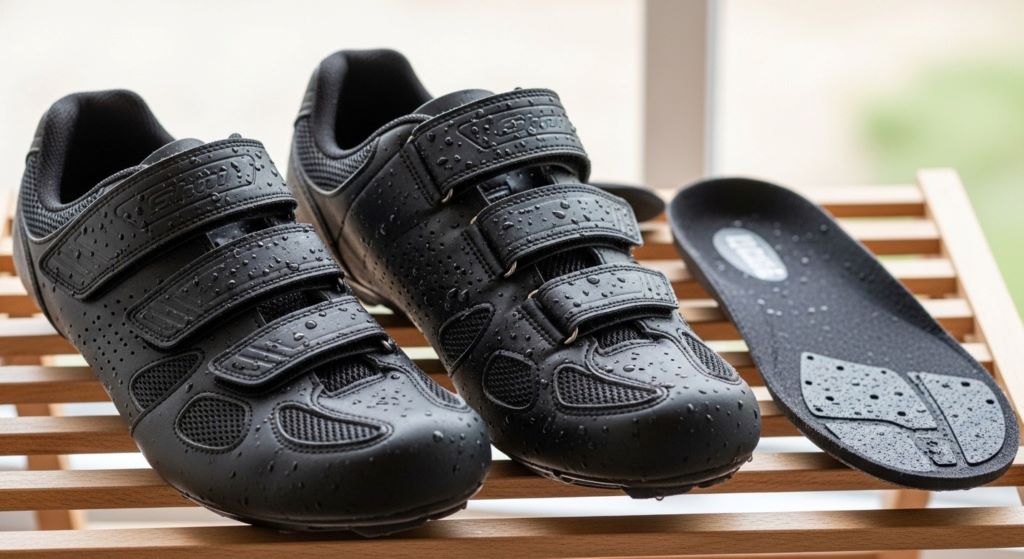
Remove the insoles immediately after riding. These retain significant moisture and take longer to dry than the shoe itself. Drying them separately improves air circulation and prevents the damp insole from keeping the interior of the shoe wet.
Stuff your shoes with newspaper or specialized shoe trees. This absorbs moisture from the inside while helping the shoes maintain their shape. Replace the newspaper every few hours for faster drying. Avoid using printed newspaper directly against light-colored shoe interiors, as the ink can transfer.
Position shoes in a well-ventilated area away from direct sunlight. Good airflow accelerates drying without the damaging effects of heat. A fan nearby can help, but don’t point it directly at the shoes for extended periods.
Consider using shoe dryers designed for athletic footwear. These devices provide gentle, low-temperature air circulation that speeds drying without causing damage. They’re particularly valuable if you ride frequently and need shoes ready for the next day.
Storage Solutions That Protect Your Investment
Where and how you store your cycling shoes between rides affects their condition significantly. Proper storage prevents unnecessary wear and keeps shoes ready for action.
Store shoes in a cool, dry place away from direct sunlight. A closet or dedicated gear storage area works well. Avoid damp basements or hot attics where temperature extremes and humidity can damage materials.
Keep shoes away from sources of ozone, such as electric motors and UV lights. Ozone breaks down rubber compounds in soles and can deteriorate other materials over time. This includes keeping shoes away from certain air purifiers and workshop equipment.
Use shoe bags or boxes for long-term storage. This protects against dust accumulation and accidental damage. Breathable fabric bags work better than sealed plastic containers that can trap moisture.
Never store shoes while they’re still damp. Always ensure complete drying before putting shoes away, especially if storing them for an extended period. Trapped moisture promotes mold growth and material degradation.
Maintain the shoe’s shape during storage. Use shoe trees or stuff them lightly with acid-free tissue paper. This prevents creasing and helps the shoes retain their form. However, don’t overstuff them, as this can stretch materials.
Inspecting and Addressing Small Issues Early
Regular inspections help you catch minor problems before they become major failures. A few minutes of examination after cleaning can save you from costly replacements.
Check the cleat mounting area after every few rides. Look for cracks, loose bolts, or separation between the sole and upper. Tighten any loose mounting bolts before they cause further damage. Replace cleats when worn, as damaged cleats can stress mounting points.
Examine stitching along seams and high-stress areas. Loose or fraying threads indicate developing problems. A small stitch repair now prevents complete seam failure later. Many shoe repair shops can reinforce seams inexpensively.
Inspect closure systems regularly. Buckles should click securely, straps should show no fraying, and velcro should maintain strong grip. Replace worn velcro straps before they fail completely. Many manufacturers sell replacement parts for their closure systems.
Look for sole separation or delamination. Small areas where the sole begins pulling away from the upper can often be reglued. Use a flexible adhesive designed for shoe repair, applying it carefully and clamping the area until fully cured.
Monitor the condition of your insoles. These wear out faster than the shoes themselves and directly affect comfort. Replacing insoles when they lose their shape or support extends the useful life of your shoes considerably.
Protecting Shoes During Use
How you use your cycling shoes impacts their lifespan. Certain practices reduce unnecessary wear and protect vulnerable components.
Walk on cleated shoes as little as possible. Cleats weren’t designed for walking, and excessive walking damages both the cleats and the shoe sole. Use cycling-specific shoe covers with grippy soles if you need to walk significant distances.
Use heel protectors or toe caps when appropriate. These add-ons shield high-wear areas from scuffs and abrasion. They’re particularly valuable for commuters who need to walk to and from their bikes regularly.
Avoid dragging your feet during stops. When coming to a stop, unclip smoothly without scraping your shoe along the ground. This simple habit prevents unnecessary abrasion on the toe box and sides.
Be mindful during bike maintenance. Shoes often get kicked, dropped, or stepped on while working on bikes. Place them safely away from your work area to prevent accidental damage.
Consider having multiple pairs if you ride frequently. Rotating between pairs allows each to dry completely between uses. This practice significantly extends the life of both pairs compared to wearing the same shoes every day.
Dealing with Odor and Bacterial Growth
Odor isn’t just unpleasant; it indicates bacterial and fungal growth that can deteriorate materials. Addressing this issue protects both your shoes and your health.
Dry shoes completely after every ride. Bacteria and fungi thrive in damp environments. Thorough drying is your first defense against odor development.
Use antimicrobial sprays or powders designed for athletic shoes. Apply these products after shoes are completely dry. They help control bacterial growth between wearings. However, don’t rely on these products as a substitute for proper cleaning and drying.
Wash insoles separately on a regular basis. Hand washing with mild soap and thorough air drying keeps insoles fresh and extends their life. Some insoles are machine washable, but always check manufacturer recommendations.
Freeze your shoes occasionally to kill bacteria. Place completely dry shoes in a sealed plastic bag and freeze overnight. This won’t eliminate existing odors but helps control bacterial populations. Ensure shoes are bone dry before freezing to prevent ice crystal damage.
Consider using cedar shoe trees. Natural cedar has antimicrobial properties and absorbs moisture while imparting a pleasant scent. They also help maintain shoe shape during storage.
Seasonal Considerations for Shoe Longevity
Different seasons present unique challenges for cycling footwear. Adjusting your shoe care guide based on seasonal conditions helps address specific threats to longevity.
Winter riding introduces salt and chemical de-icers that corrode materials and damage finishes. Rinse shoes thoroughly after every winter ride to remove these corrosive substances. Pay extra attention to metal components like buckles and mounting hardware.
Summer heat accelerates material degradation. Store shoes in the coolest available location and avoid leaving them in hot cars. Heat can soften adhesives and warp certain materials, particularly in cheaper shoes.
Rainy season demands extra drying vigilance. Invest in quality shoe covers to minimize water penetration. After wet rides, dry shoes thoroughly using the techniques discussed earlier. Don’t put shoes away damp just because the forecast calls for more rain.
Spring and fall typically present ideal conditions for cycling shoes. However, these transitional seasons often bring unexpected weather. Always prepare for wet conditions and have backup drying options available.
When to Consider Professional Repairs
Some repairs exceed the scope of home maintenance. Knowing when to seek professional help can save shoes you might otherwise discard.
Sole replacement or rebuilding services exist for high-end cycling shoes. Specialty shoe repair shops can replace worn soles, rebuild cleat mounting areas, and perform structural repairs. This option makes economic sense for expensive shoes that otherwise remain in good condition.
Professional cleaning services can address deep-set stains and odors. These services use specialized techniques and products not available to consumers. Consider this option for expensive shoes before declaring them beyond saving.
Buckle and closure system replacement often requires specific parts and tools. While some manufacturers sell replacement parts directly, others require professional installation. Contact the manufacturer or an authorized dealer for guidance.
Custom orthotic integration sometimes requires professional modification. If you need to accommodate custom orthotics, a professional can ensure proper fit without damaging your shoes.
Product Selection for Long-Term Value
Choosing quality products from the start makes maintenance easier and extends potential lifespan. Understanding what separates lasting shoes from disposable ones helps you make smart purchasing decisions.
Construction quality matters more than brand recognition. Look for shoes with stitched construction rather than purely glued assemblies. Multiple attachment methods between the sole and upper create more durable bonds.
Material selection affects longevity significantly. High-quality synthetic materials often outlast cheaper alternatives while resisting water and UV damage better. Leather components require different care but can last decades with proper attention.
Replaceable components add years to shoe life. Shoes with replaceable buckles, straps, insoles, and even cleats offer better long-term value. Research the availability of replacement parts before purchasing.
Warranty coverage indicates manufacturer confidence. Longer warranty periods suggest better construction quality. Additionally, good warranty service helps if defects appear despite proper care.
Creating a Maintenance Schedule
Consistency makes maintenance manageable. Establishing a routine ensures nothing gets overlooked while preventing tasks from becoming overwhelming.
After every ride, complete basic cleaning and drying. This takes just minutes but prevents the majority of damage. Make it as habitual as putting your bike away.
Weekly, perform detailed inspections. Check all closure systems, examine stitching, and assess overall condition. Address any minor issues immediately.
Monthly, deep clean your shoes and insoles. This more thorough cleaning removes accumulated grime that daily maintenance misses. It’s also a good time to apply protective treatments if needed.
Seasonally, evaluate your shoes comprehensively. Consider whether cleats need replacement, if professional repairs would be worthwhile, or if it’s time to start shopping for replacements.
Understanding When Replacement Makes Sense
Despite your best efforts to maintain cycling shoes, eventually replacement becomes necessary. Recognizing this point prevents compromised performance and potential injury.
Structural damage beyond simple repair means it’s time for new shoes. Cracked soles, separated uppers, or broken cleat mounting systems compromise both performance and safety. Continuing to use severely damaged shoes risks injury.
When shoes no longer provide adequate support, replacement is warranted. Collapsed arch support, compressed padding, or worn-out stiffening materials reduce pedaling efficiency and can cause foot pain or injury.
If you’ve performed multiple repairs and issues keep appearing, the shoes have reached the end of their useful life. At some point, replacement becomes more economical than continued repairs.
Conclusion
Extending the lifespan of your cycling shoes doesn’t require expensive products or excessive time. The key lies in establishing consistent habits around cleaning, drying, storage, and inspection. By implementing these practices to maintain cycling shoes, you protect your investment while ensuring optimal performance ride after ride.
Remember that prevention beats repair. Regular cleaning after rides, proper drying techniques, and appropriate storage prevent most problems before they start. When issues do arise, addressing them promptly prevents minor problems from becoming major failures.
Following this shoe care guide helps you get maximum value from your cycling footwear. Quality shoes combined with proper maintenance can serve you faithfully for many seasons. The time you invest in care pays dividends through extended shoe life, better performance, and ultimately, more enjoyable rides.
Whether you’re riding casually or competitively, your cycling shoes deserve attention and care. Implement these strategies starting with your next ride, and you’ll notice the difference in how long your shoes last and how well they perform throughout their extended lifespan.
Frequently Asked Questions
How often should I deep clean my cycling shoes?
Deep clean your cycling shoes at least once a month if you ride regularly. However, adjust this frequency based on riding conditions. If you frequently ride in muddy or wet conditions, clean them more often. Basic cleaning after every ride prevents heavy buildup that requires intensive deep cleaning. Regular light maintenance reduces the need for frequent deep cleaning sessions.
Can I machine wash my cycling shoes?
Generally, you should not machine wash cycling shoes. The agitation and heat can damage adhesives, warp materials, and harm closure systems. Hand washing with mild soap and lukewarm water is safer and more effective. However, some manufacturers specifically design certain models to be machine washable. Always check your shoe’s care instructions before attempting machine washing.
How do I know when it’s time to replace my cycling shoes?
Replace your cycling shoes when you notice structural damage like cracks in the sole, separation between components, or broken closure systems. Additionally, replace them if they no longer provide adequate support or if your feet hurt after rides despite proper fit. Worn-out cleat mounting areas that can’t securely hold cleats also indicate it’s time for replacement. Visible wear is acceptable, but functional compromise means replacement is necessary.
What’s the best way to eliminate persistent odor from cycling shoes?
For persistent odor, start by thoroughly washing both the shoes and insoles with enzymatic cleaners designed to break down odor-causing bacteria. Dry them completely, then use antimicrobial sprays. Freezing completely dry shoes overnight kills bacteria. If odor persists, replace the insoles, as they often harbor bacteria that survive cleaning. In extreme cases, professional cleaning services can address deep-set odor problems.
Should I use waterproofing sprays on my cycling shoes?
Waterproofing treatments can extend shoe life by protecting materials from moisture damage. However, use products specifically designed for the materials in your shoes. Some waterproofing sprays can reduce breathability or damage certain synthetics. Apply treatments to clean, dry shoes and follow manufacturer instructions carefully. Reapply periodically, especially before rainy seasons. Remember that waterproofing helps but doesn’t make shoes completely impervious to water.
Related Topics:
Top Safety Features in Modern Bike Helmets Explained: Schwinn Intercept Helmet Safety Spotlight
Best Skate Shoe Brands Ranked: From Classics to New Favorites