

Picture this. You tuck your little one into bed and step away for a moment. Yet, you still see every smile and hear every coo. That’s the magic of a reliable baby monitor. It brings peace to new parents. Today, many families count on these devices for safety and ease. According to the Centers for Disease Control and Prevention, around 1,300 infants face sudden infant death syndrome each year in the United States. Additionally, the global market for baby sleep monitors hits $1 billion annually, as per recent studies from the National Institutes of Health. So, setting up HelloBaby monitor becomes a smart move for watchful care. In this guide, we walk through five simple steps to get your HelloBaby 6″ IPS model ready. First, let’s dive in.
Why Choose the HelloBaby 6″ IPS Baby Monitor?
Parents often search for tools that fit their busy lives. The HelloBaby 6″ IPS stands out with its clear screen and user-friendly design. You get a large display that shows sharp images day or night. Moreover, it offers two-way talk, so you can soothe your baby from afar. Many users praise its long battery life and easy controls.
But what makes it special? The IPS technology ensures wide viewing angles. You see details without squinting. Additionally, infrared night vision kicks in automatically. This means you monitor sleep without lights on. Families with multiple kids find the zoom feature helpful too. It lets you focus on specific areas.
Furthermore, safety comes first. The monitor uses secure signals to avoid interference. You connect without worries. Parents report fewer false alarms compared to older models. So, you rest easy knowing it’s reliable.
In short, this device blends tech with simplicity. It supports your parenting journey. Now, let’s prepare for installation.
Gather Your Tools and Prepare the Space
Before you start, check what you need. The box includes the parent unit, camera, adapters, and manual. Make sure everything arrives intact. If something misses, contact support right away.
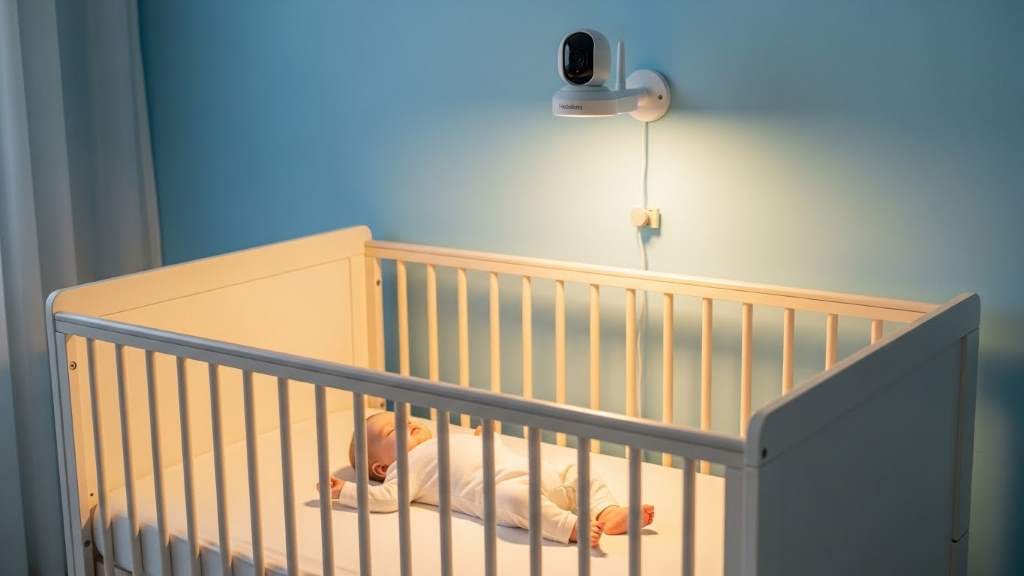
Next, pick a spot for the camera. Choose a high place like a shelf or wall mount. It should overlook the crib clearly. Avoid direct sunlight or heat sources. These can affect performance.
Also, ensure outlets nearby for power. The camera plugs in constantly, while the parent unit charges as needed. Keep cords out of reach to prevent hazards.
Moreover, test the room’s signal strength. Walls or distance might weaken it. If issues arise, move closer during setup.
Finally, read the manual briefly. It highlights key buttons and features. This step saves time later. With prep done, move to the first action.
Step 1: Unbox and Inspect All Components
You open the package with excitement. Inside, find the 6″ IPS screen parent unit. It feels sturdy in your hands. Beside it sits the camera with its adjustable stand.
Inspect each piece carefully. Look for damage from shipping. The camera lens should be clean and scratch-free. Plug adapters show no bent prongs.
Additionally, locate the power cords. They connect easily. The manual provides diagrams for quick reference.
Why inspect? It ensures everything works from the start. Many parents skip this and face delays. So, take a moment here.
If all looks good, set items on a flat surface. Organize them for easy access. This keeps the process smooth.
Transitioning now, charge the devices next. Proper power sets the foundation.
Step 2: Charge the Parent Unit and Camera
Plug in the parent unit first. Use the provided adapter. Connect it to a wall outlet. The screen lights up, showing a battery icon.
Let it charge fully. This takes about four hours. Meanwhile, connect the camera. It needs constant power, so find a stable spot.
Why charge now? A full battery prevents interruptions during pairing. You avoid low-power warnings mid-setup.
Furthermore, watch the indicators. The parent unit beeps when ready. The camera shows a steady light.
During this time, explore the buttons. Familiarize yourself with volume and menu keys. It builds confidence.
Once charged, proceed to linking them. This step brings the system to life.
Step 3: Pair the Camera with the Parent Unit
Turn on the parent unit. Press the power button firmly. The screen activates, displaying options.
Next, activate the camera. It powers up automatically when plugged in. Look for a blinking light indicating ready mode.
On the parent unit, navigate to the pairing menu. Use arrow keys to select. Then, press confirm.
The devices connect wirelessly. You see a confirmation message. If not, repeat the process.
However, distance matters. Keep them close initially. This strengthens the signal.
Additionally, test the view. Adjust the camera angle for the best crib coverage. Zoom in if needed.
Success here means live feed appears. You now monitor in real time. Celebrate this milestone.
But wait, position it properly next. Placement enhances functionality.
Step 4: Position the Camera in the Nursery
Mount the camera securely. Use the stand or wall bracket. Aim it at the crib’s center.
Ensure a clear line of sight. Remove obstacles like toys or curtains. This provides unobstructed views.
Moreover, consider height. Place it at least three feet above the crib. It prevents curious hands from reaching.
Test different angles. Pan and tilt features help. You find the perfect spot.
Furthermore, check night vision. Dim the lights and verify clarity. Infrared works wonders in dark rooms.
Safety tip: Secure cords tightly. Use clips to hide them. This reduces risks.
With positioning set, customize features. Tailor it to your needs.
Step 5: Customize Settings for Optimal Use
Access the menu on the parent unit. Scroll through options. Adjust volume first for clear audio.
Set temperature alerts next. The monitor tracks room conditions. You get notifications if too hot or cold.
Additionally, enable lullabies. Choose soothing tunes to play remotely. It calms fussy moments.
Explore VOX mode too. It activates the screen on sound detection. This saves battery.
Moreover, set zoom levels. Focus on your baby’s face or the entire room.
Test two-way talk. Speak into the unit and hear responses. It feels like magic.
Finally, save changes. Your setup completes. Enjoy the added security.
Advanced Features to Explore After Setup
Now that basics work, dive deeper. The HelloBaby offers split-screen for multiple cameras. Add more if you have twins.
Furthermore, motion detection alerts you to movement. Set sensitivity to avoid unnecessary pings.
Night vision enhances low-light viewing. It switches seamlessly.
Additionally, battery saver modes extend usage. Activate them for longer sessions.
Parents love the range. It covers most homes without drops.
Experiment with these. They boost your experience.
Troubleshooting Common Setup Issues
Sometimes, things glitch. If no signal shows, check power sources. Replug everything.
Pairing fails? Reset both units. Hold the reset button for seconds.
Screen fuzzy? Clean the lens gently. Dust causes blurs.
Audio cuts out? Adjust volume or move closer.
Interference happens with other devices. Switch channels in settings.
These fixes resolve most problems quickly.
Benefits of Using a Baby Monitor Like HelloBaby
Monitors provide peace. You check on your baby without disturbing sleep.
They support multitasking. Cook dinner while watching.
Moreover, they track patterns. Notice when your little one stirs.
Families report better rest. Less worry means more sleep.
In busy homes, they connect parents. Dads at work can view via apps if connected.
Overall, they enhance parenting.
Safety Tips for Baby Monitor Usage
Always place cameras out of reach. Babies explore everything.
Secure all wires. Use covers to hide them.
Monitor battery levels. Charge regularly.
Avoid over-reliance. Check in person too.
Update firmware if available. It improves security.
These habits keep everyone safe.
Integrating the Monitor into Your Daily Routine
Start small. Use it during naps first.
Then, incorporate at bedtime. It becomes habit.
Share access with partners. Both stay informed.
Additionally, use during playtime. Watch from another room.
Over time, it feels essential.
Stories from parents show this. One mom caught a fever early thanks to alerts.
Another dad soothed cries without entering.
It fits seamlessly.
Related:
Best Baby Monitors for New Parents: Features That Matter Most
Wide Toe Box Baby Shoes: Top Recommendations for Growing Feet
Comparing HelloBaby to Other Monitors
Many options exist. Some have smaller screens.
HelloBaby’s 6″ IPS offers better visibility.
Others lack zoom. This one includes it.
Battery life varies. HelloBaby lasts longer.
Users switch for these reasons.
However, choose based on needs.
Maintaining Your HelloBaby Monitor
Clean screens weekly. Use soft cloths.
Store properly when not in use.
Check connections monthly.
This extends life.
Simple care pays off.
Environmental Considerations for Setup
Room temperature affects performance. Keep it moderate.
Humidity matters too. Avoid damp areas.
Light influences visibility. Position away from windows.
These factors optimize use.
User Stories and Experiences
Sarah, a new mom, set hers up in minutes. She loves the clear picture.
Mike, a dad of two, uses split-screen daily.
Their tales inspire.
You might share yours online.
Expanding Your Monitoring System
Add extra cameras. Cover more rooms.
Integrate with smart home if possible.
This grows with your family.
Conclusion
Setting up your HelloBaby 6″ IPS baby monitor takes five straightforward steps. You unbox, charge, pair, position, and customize. Each action builds security and ease. Remember, preparation and troubleshooting help along the way. Now, enjoy watchful parenting. Take the first step today and install yours for better nights.
FAQs
What if the camera doesn’t pair on the first try?
Try resetting both units. Hold the power button for 10 seconds. Then, attempt pairing again in a closer range.
How far can the monitor reach?
It covers up to 1000 feet in open spaces. Walls reduce this, so test in your home.
Can I use it for multiple children?
Yes, add extra cameras. The screen supports split views for watching siblings.
What does the temperature monitor do?
It tracks room heat. Alerts notify you if levels drop or rise beyond safe zones.
Is night vision automatic?
Absolutely. It activates in low light. You see clear black-and-white images.
References
- Centers for Disease Control and Prevention on SIDS: https://www.cdc.gov/sids/about/index.htm
- National Institutes of Health study on baby monitors: https://pmc.ncbi.nlm.nih.gov/articles/PMC12406816/
- Insight Partners report on smart baby monitors: https://www.theinsightpartners.com/reports/smart-baby-monitor-market
- Undark article on SIDS monitors: https://undark.org/2021/05/24/sids-monitors-may-not-prevent-sids