
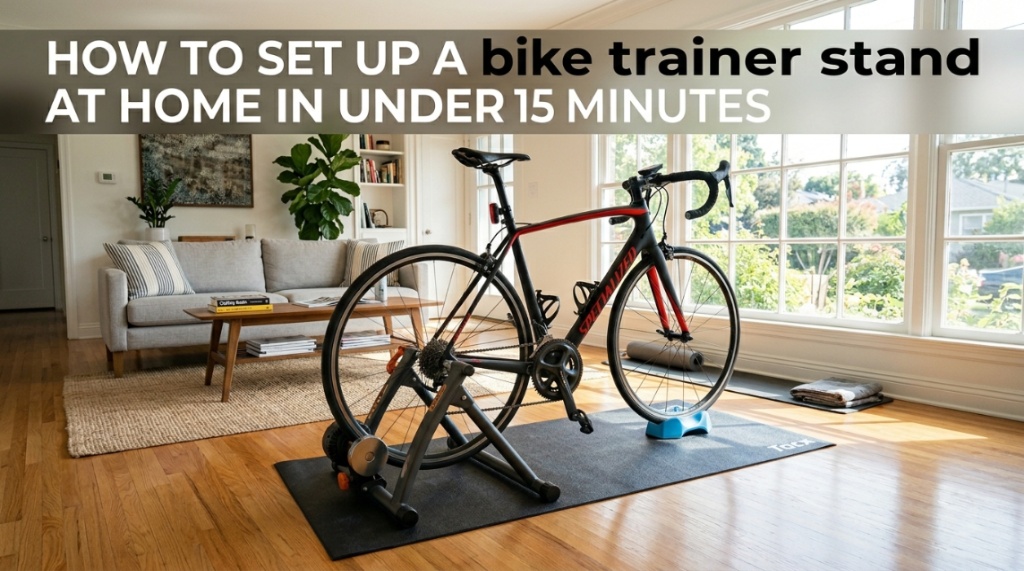
I timed myself setting up a new bike trainer stand last Tuesday — from unboxing to first pedal stroke took exactly 11 minutes. No tools beyond what came in the box, no YouTube tutorials running in the background. Most people overthink the bike trainer setup process, assuming it requires mechanical expertise or a dedicated bike workshop. It doesn’t. If you can change a lightbulb, you can mount your bike on a trainer stand and start riding indoors today.
A bike trainer stand setup involves securing the trainer frame to a stable surface, attaching your bicycle via the rear axle, adjusting resistance contact (for wheel-on types), and connecting any wireless sensors. The entire process requires minimal tools and zero permanent modifications to your bike.
What Do You Need Before Setting Up Your Bike Trainer Stand?
You need the trainer unit, the included skewer or adapter, a trainer mat, and your bike — that’s the complete list for a functional bike trainer stand setup.
Before starting, gather these items:
- Trainer stand (fully unboxed with all included hardware)
- Trainer-specific skewer or thru-axle adapter (included with most trainers)
- Trainer mat or thick rubber mat (protects floors, reduces vibration)
- Front wheel riser block (levels your bike — included with many trainers)
- Allen key set (usually 4mm and 5mm for minor adjustments)
- Towel (for sweat protection during rides)
Optional but recommended: a dedicated trainer tire if you’re using a wheel-on trainer. This saves your expensive road tire from accelerated wear against the resistance roller.
How Do You Assemble a Wheel-On Bike Trainer Stand Step by Step?
Unfold the trainer legs, lock them in position, swap your rear skewer for the trainer-supplied one, mount the bike, and adjust roller pressure — five steps, under 10 minutes.
Step 1: Position the trainer frame (1 minute)
Place your trainer mat on a hard, level surface. Unfold the trainer’s legs until they click into the locked position. Most trainers have a wide A-frame or tripod design for stability. Ensure all rubber feet contact the floor evenly.
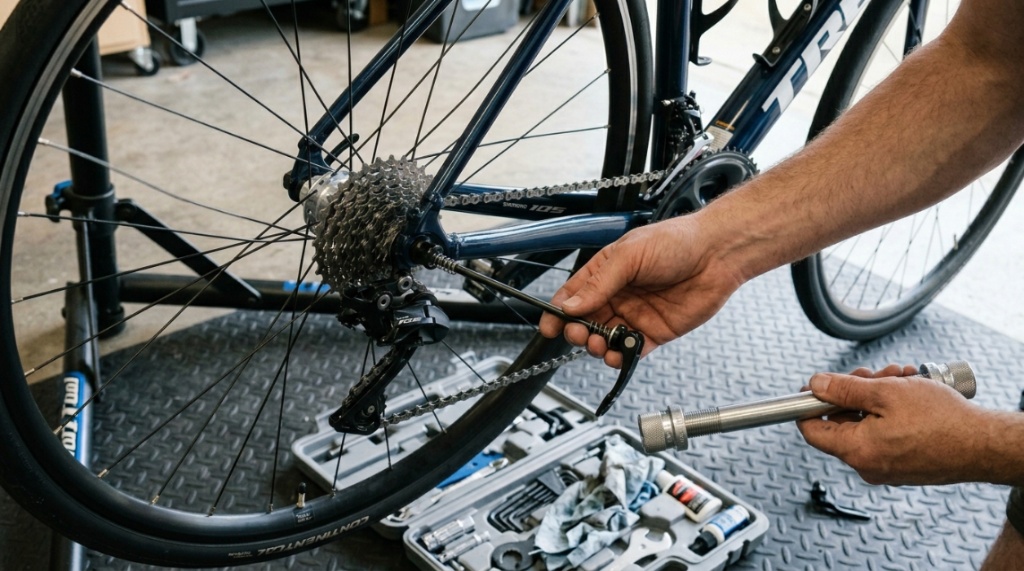
Step 2: Swap the rear skewer (3 minutes)
Remove your bike’s rear quick-release skewer. Replace it with the trainer-supplied skewer — this one has cone-shaped ends that seat into the trainer’s mounting cups. Tighten firmly but don’t overtorque. If your bike uses a thru-axle, install the appropriate adapter (12x142mm or 12x148mm) that came with your trainer.
Step 3: Mount the bike onto the trainer (2 minutes)
Lift your rear wheel and lower the skewer ends into the trainer’s mounting cups. Close the clamping mechanism — most use a lever or knob system. Your bike should feel completely stable with no lateral movement. Give it a firm side-to-side shake to verify.
Step 4: Adjust roller contact pressure (2 minutes)
Turn the resistance roller knob until it contacts your rear tire. Apply enough pressure that the roller doesn’t slip during hard efforts, but not so much that it deforms the tire visibly. A good test: spin the pedals — the tire should engage immediately without slipping, and stop within 2–3 seconds when you stop pedaling.
Step 5: Level the front wheel (1 minute)
Place the front wheel riser block under your front tire. This compensates for the height difference created by the rear wheel being elevated on the trainer. A level bike prevents uncomfortable pressure on your hands and shoulders during longer rides.
How Do You Set Up a Direct-Drive Trainer Differently?
Direct-drive setup skips the tire contact step entirely — you remove your rear wheel and bolt your bike’s chain directly onto the trainer’s built-in cassette.
The process differs from wheel-on trainers:
- Remove your rear wheel completely
- Install a cassette on the trainer (if not pre-installed) — requires a cassette lockring tool
- Attach the appropriate thru-axle adapter to the trainer
- Lower your bike’s rear dropouts onto the trainer axle
- Secure with the thru-axle or quick-release
- Shift through gears to verify chain alignment
Direct-drive setup takes slightly longer the first time (15–20 minutes) because of cassette installation. After that initial setup, mounting and dismounting takes under 5 minutes since the cassette stays on the trainer permanently.
What’s the Best Location in Your Home for a Bike Trainer?
Choose a spot with hard flooring, adequate ventilation, proximity to a power outlet (for fans), and enough clearance for handlebar movement — garages, spare rooms, and basements work best.
Location considerations ranked by importance:
- Ventilation: You’ll generate 3–4x more heat indoors than outdoors at the same effort. A fan is mandatory, and natural airflow helps enormously.
- Flooring: Hard surfaces (concrete, tile, hardwood) provide stability. Carpet compresses unevenly and can make the trainer wobble.
- Space: You need approximately 6 feet long × 3 feet wide minimum. Add space for a fan in front and a table for water/phone beside you.
- Noise isolation: If you’re above neighbors, position the trainer against a load-bearing wall rather than the center of the room — less floor vibration transmission.
- Entertainment access: Within view of a TV or screen makes longer sessions more bearable. Smart trainer users need WiFi range for app connectivity.
How Do You Connect a Smart Trainer to Apps After Physical Setup?
Power on the trainer, open your training app, search for available Bluetooth or ANT+ devices, and pair the trainer as both a power source and controllable trainer.
Connection steps for most apps (Zwift, TrainerRoad, Rouvy):
- Ensure your trainer’s firmware is updated (check manufacturer’s app first)
- Open the training app on your device
- Navigate to device pairing or sensor settings
- Select “Power Source” — choose your trainer from the detected list
- Select “Controllable Trainer” — pair the same device
- Optionally pair cadence (often built into smart trainers)
- Run a spindown calibration for accurate power readings
Pro tip: If your trainer doesn’t appear in the app, pedal for 5–10 seconds first. Many trainers enter sleep mode and only broadcast when the flywheel is spinning. Also ensure no other device (phone, computer, bike computer) is already connected — most trainers support only one simultaneous Bluetooth connection.
What Are Common Setup Mistakes That Waste Time?
Using the wrong skewer, over-tightening the roller, and skipping calibration are the three mistakes that cause 90% of setup frustration and wasted time.
Avoid these errors:
- Using your original skewer: Standard quick-release skewers don’t fit trainer mounting cups properly. Always use the trainer-supplied skewer — it’s designed for the specific cup geometry.
- Over-tightening roller pressure: Excessive pressure causes premature tire wear, increases noise, and creates unrealistic resistance. The tire should compress 1–2mm against the roller, no more.
- Skipping calibration: An uncalibrated trainer can read 10–20% off on power. Calibrate after every setup and after 10 minutes of warmup riding for best accuracy.
- Forgetting tire pressure: Inflate your rear tire to the manufacturer’s maximum recommended pressure for wheel-on trainers. Low pressure increases rolling resistance and heat buildup.
- Ignoring firmware updates: Outdated firmware causes connectivity drops, inaccurate readings, and app compatibility issues.
Many cyclists set up stationary trainers at home to prepare for multi-day gravel grinds or alpine tours where sleep conditions are unpredictable. While hitting your power zones indoors builds the necessary endurance, your sleep gear determines how well you bounce back after 80 miles in the saddle. For those planning to camp along their route, balancing packability and sleep quality is essential; we highly recommend reading our guide on selecting a Travel Pillow for Outdoor Adventures (Comfort vs Weight Guide) before packing your bags.
How Do You Make Your Trainer Setup More Comfortable for Long Rides?
Add a powerful fan, position a screen at eye level, use a sweat guard on your frame, and consider switching to a more padded saddle or cycling shorts for indoor sessions.
Indoor riding feels harder than outdoor riding at the same power because you lack wind cooling. Your body temperature rises faster, heart rate drifts higher, and perceived effort increases. Combat this with:
- High-velocity fan: Position directly in front, aimed at your torso. Industrial fans (not household oscillating fans) make a dramatic difference.
- Sweat management: A frame-mounted sweat guard prevents corrosive salt damage to your headset, stem, and top tube. Place a towel over your handlebars.
- Hydration within reach: You’ll drink 50–100% more water indoors. Keep 2 bottles accessible without dismounting.
- Entertainment: Music, podcasts, Netflix, or virtual riding apps prevent mental fatigue during steady-state sessions.
- Bike fit adjustments: Some riders lower their saddle 2–3mm for indoor use since the bike doesn’t move laterally like it does outdoors.
Can You Quickly Switch Between Indoor Training and Outdoor Riding?
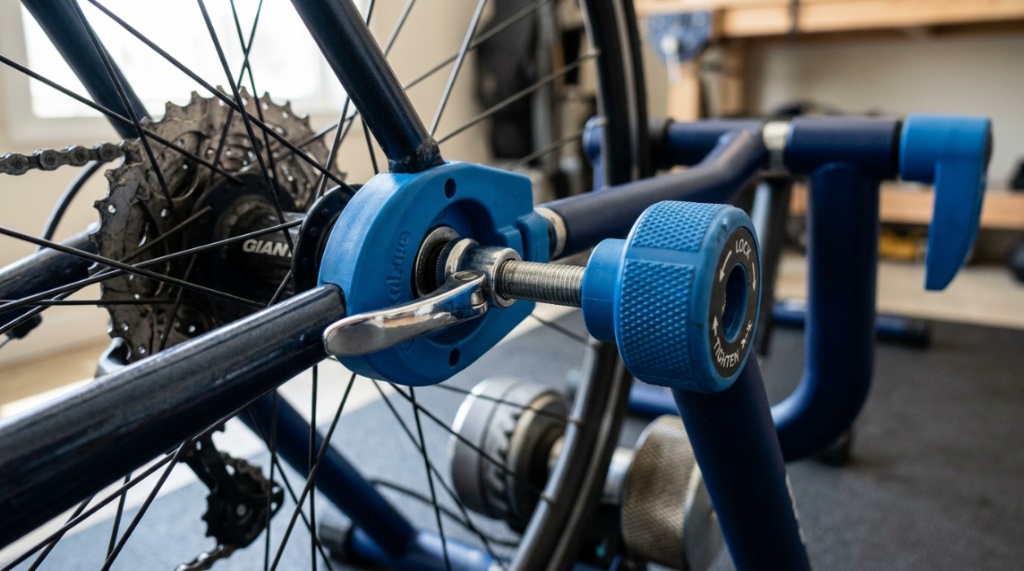
With a wheel-on trainer, switching takes 3–5 minutes — just release the clamp, swap skewers, and ride. Direct-drive trainers require reinstalling your rear wheel, adding 2–3 minutes.
Speed up transitions with these strategies:
- Keep the trainer-specific skewer permanently on a spare rear wheel
- Use a second cassette on your direct-drive trainer matching your outdoor gearing
- Store your trainer in a semi-permanent position so you only need to mount/dismount the bike
- Mark your roller pressure setting with tape so you don’t readjust each time
Many dedicated indoor cyclists keep a second, older bike permanently mounted on the trainer. This eliminates transition time entirely and prevents wear on their primary outdoor bike’s drivetrain.
Conclusion
Setting up a bike trainer stand at home genuinely takes under 15 minutes once you understand the sequence. Unbox, unfold, swap skewer, mount bike, adjust roller, ride. The first time might take 20 minutes as you familiarize yourself with the hardware. Every subsequent setup drops to 5 minutes or less — especially if you leave the trainer in position and only remove the bike.
Don’t let setup anxiety delay your indoor training. The process is simpler than assembling flat-pack furniture and requires fewer tools. Get your trainer positioned today, do one short test ride to verify everything works, and you’ll have a ready-to-ride indoor cycling station whenever motivation strikes.
Already set up your trainer? Share your setup time in the comments — I’d bet most of you beat my 11-minute benchmark once you’ve done it twice.
Frequently Asked Questions
Do I need any special tools to set up a bike trainer stand?
Most wheel-on trainers require zero tools beyond what’s included in the box. Direct-drive trainers may need a cassette lockring tool and chain whip for initial cassette installation ($15–$25 for both). After first setup, no tools are needed for daily mounting and dismounting.
Can I set up a bike trainer on carpet?
You can, but it’s not ideal. Carpet compresses unevenly under the trainer’s feet, causing slight instability during hard efforts. If carpet is your only option, place a sheet of plywood (3/4″ thick, 4×3 feet) under the trainer mat to create a firm, level platform.
How tight should the roller be against my tire?
The roller should compress your tire approximately 1–2mm. A simple test: spin the pedals backward — the tire should engage immediately without slipping. If you hear squealing during hard efforts, increase pressure slightly. If the tire deforms visibly, you’ve gone too far.
Why won’t my smart trainer connect to my phone?
The most common cause is another device already holding the Bluetooth connection. Trainers typically support one Bluetooth connection at a time. Close all other fitness apps, unpair from other devices, and try again. Also pedal briefly — many trainers only broadcast while the flywheel spins.
Do I need to deflate my tire when storing the bike on the trainer?
Release roller pressure when not riding to prevent flat spots on your tire. You don’t need to deflate the tire itself, but backing off the roller contact eliminates the constant compression point that can deform the tire over days or weeks.
How often should I calibrate my trainer after setup?
Calibrate (spindown) before every ride for best accuracy, or at minimum once per week. Always calibrate after the trainer has warmed up for 10 minutes — cold resistance units read differently than warm ones, sometimes by 5–10 watts.