
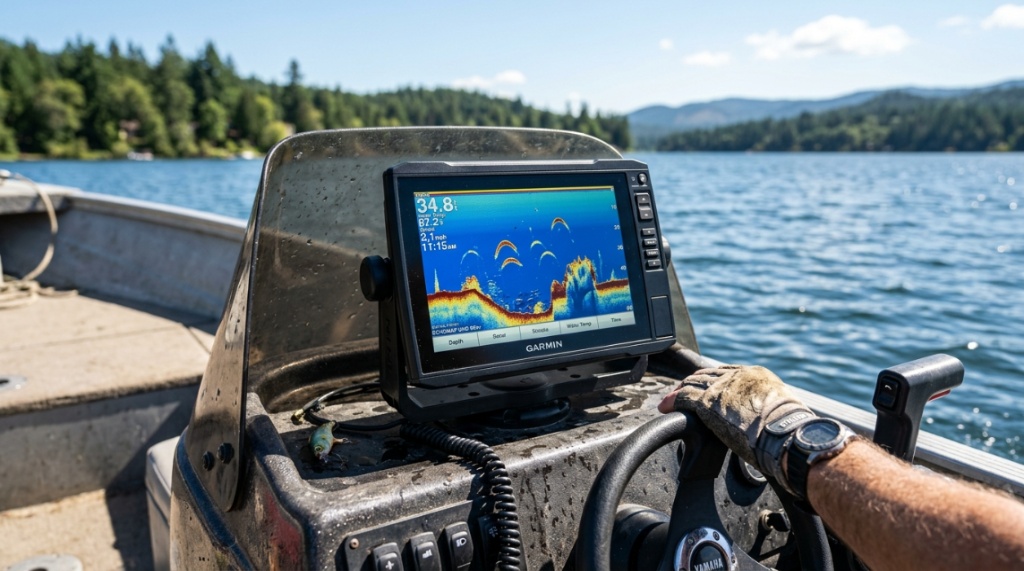
You’re standing on the boat ramp, watching other anglers roar off into the distance. You know there are fish out there, but you’re guessing at the bottom structure. Your wallet is tight, and the thought of dropping $800 on a fish finder makes your stomach turn. The good news? You don’t need to spend a mortgage payment to know exactly what is happening under your hull. Finding cheap depth finders that work is about knowing which features you actually need and which ones are just expensive noise. This guide cuts through the marketing hype to show you exactly how to get reliable depth readings, clear fish arches, and accurate bottom contour maps without breaking the bank. We are focusing on real performance for real anglers.
What Exactly Defines a Depth Finder That Works on a Budget?
A depth finder that works on a budget is any device that accurately measures water depth, identifies bottom hardness, and shows fish-holding structure for under $200. Many anglers confuse price with performance. A $100 unit from a reputable brand often delivers 90% of the functionality of a $500 unit for basic fishing scenarios like inland lake fishing, river fishing, or nearshore saltwater trips.
Core Performance Metrics You Cannot Ignore
When evaluating cheap depth finders that work, focus on three primary metrics: cone angle, wattage (RMS), and pixel count on the display. A wider cone angle (60–90 degrees) gives you more coverage in shallow water. Higher RMS wattage (200–400 watts) provides better target separation. A display with at least 240 x 160 pixels ensures you can actually see what the sonar is telling you.
The Difference Between Depth Finders and Fish Finders
Strictly speaking, a depth finder only tells you how deep the water is. A fish finder adds sonar technology to show fish arches and structure. In today’s market, almost every affordable unit combines both functions. When we say “depth finder that works,” we mean a combination unit that reliably shows bottom contour, depth, and basic fish returns without sophisticated side-imaging or GPS mapping.
Why Expensive Units Often Fail for the Average Angler
High-end units pack features like real-time mapping, side-imaging, and 4K displays. These features consume power, require complex installation, and often overwhelm casual anglers. A simpler, cheaper unit is frequently more reliable because it has fewer points of failure. If you fish under 100 feet of water most of the time, you are paying a premium for capability you will never use.
Which Sonar Technology Is Best for Affordable Depth Finders?
Traditional 2D CHIRP sonar is the best technology for affordable depth finders. CHIRP sends a sweep of frequencies (typically 80–200 kHz) rather than a single frequency. This gives you cleaner target separation and better bottom definition. Standard single-frequency sonar (200 kHz) also works well in shallow water and is found on the cheapest models. For under $150, CHIRP is your best bet.
Understanding 2D CHIRP vs. Single Frequency Sonar
Single frequency sonar operates at a fixed frequency (often 200 kHz). It is simple, effective, and cheap. The downside is that it can miss soft-bottom details and struggle in murky water. CHIRP sonar, even on a budget unit, sends a range of frequencies and interprets the returning echoes. This results in better fish arch resolution and clearer bottom hardness readings. Look for “CHIRP” in the product title, even if the unit costs under $130.
Down Imaging vs. Traditional 2D: Do You Need It?
Down imaging provides a photo-like picture of the bottom, showing underwater structures like logs, rocks, and weed beds. It is a nice feature but not essential for measuring depth. Traditional 2D sonar tells you everything you need to know for navigation and basic fishing. If your budget is extremely tight, skip down imaging entirely. It adds cost and complexity without improving depth accuracy.
How Frequency Choice Affects Depth Reading Accuracy
Higher frequencies (200 kHz) give you better detail in shallow water (under 100 feet). Lower frequencies (50–80 kHz) penetrate deeper but with less detail. For most inland and inshore fishing, a unit that offers 200 kHz or mid-band CHIRP (around 150–200 kHz) is perfect. If you fish deep lakes or nearshore saltwater, look for a unit that also supports a lower frequency like 83 kHz or 50 kHz.
How Much Should You Actually Spend on a Reliable Depth Finder?
You should spend between $80 and $200 for a reliable depth finder that works for 90% of freshwater fishing scenarios. Units in this price range from brands like Garmin, Lowrance, Humminbird, and Raymarine offer dependable sonar, easy installation, and long battery life. Spending less than $80 often means sacrificing display quality or sonar reliability.
The $50 Threshold: Why You Should Avoid It
Depth finders under $50 are often rebranded generic units with weak transducers, low-power sonar, and unreadable displays in direct sunlight. They may show depth, but the readings are often inaccurate or delayed. Worse, they fail after one season. For the extra $30–$50, you get a unit from a major brand that will last for years. This is where the line between junk and gear is drawn.
The Sweet Spot: $100–$150
This is the goldilocks zone for cheap depth finders that work. In this range, you get 4–5 inch color displays, CHIRP sonar, and sufficient pixel density to identify fish arches. Popular models like the Garmin Striker 4, Lowrance Hook Reveal 4x, and Humminbird PIRANHAMAX 4 fit perfectly here. They are proven, reliable, and come with mounting hardware and basic manuals.
While finding reliable marine electronics on a budget is essential for successful angling, ensuring you have the right gear for shoreline casting is just as important when you build a complete surf fishing gear setup for your next coastal trip.”
Why Spending $200+ Might Be Overkill for You
If you fish ponds, small lakes, rivers, or inshore bays, a $300+ unit with side-imaging and GPS is unnecessary. You will use the depth reading and maybe a basic fish alarm. The extra features complicate your setup and drain your battery faster. Reserve the higher budget for anglers fishing offshore, deep structure, or tournament scenarios.
What Key Features Make a Budget Depth Finder Effective?
An effective budget depth finder must have a clear color display, a sensitive transducer, and simple user controls. Features like GPS, mapping, and networking are optional. The most important feature is the transducer quality. A cheap unit with a good transducer will outperform an expensive unit with a poor transducer every time.
Display Brightness and Sunlight Readability
Budget units often suffer from dim displays that are unreadable in direct sunlight. Look for a unit with at least 400 nits of brightness or a reflective screen. A color display is worth the extra $20 over a grayscale model. If you fish from a kayak or small boat where you are close to the screen, size matters less. A 3.5-inch screen is workable; a 5-inch screen is comfortable.
Transducer Quality and Mounting Options
The transducer is the component that sends and receives sonar signals. Cheap units often include a basic transom-mount transducer. For best results, ensure it is a through-hull or portable transducer if you rent boats or fish from a kayak. A transom mount is easiest for standard aluminum boats. Make sure the transducer cable is long enough for your boat setup.
Battery Life and Power Consumption
Budget depth finders draw between 200 mA and 500 mA of power. A compact 7 Ah battery will run a unit for 12–18 hours of continuous use. Avoid units that require special batteries or hard-to-find connectors. Standard 12V battery clamps or SAE connectors are best. For kayak anglers, look for units that support portable battery packs or disposable battery options.
How Do You Compare Cheap Depth Finders to Avoid Buying Junk?
Compare units based on real-world user reviews, not marketing claims. Check for complaints about screen failure in heat, transducer cable corrosion, and customer support responsiveness. Stick to brands with a long history in marine electronics. Use the table below to quickly evaluate which units are worth your money.
| Brand | Best Model Under $150 | Screen Size | Key Feature |
|---|---|---|---|
| Garmin | Striker 4 | 4.3 inch | CHIRP sonar, easy menu |
| Lowrance | Hook Reveal 4x | 4.3 inch | FishReveal, Autotuning |
| Humminbird | PIRANHAMAX 4 | 4.0 inch | Side imaging option |
| Raymarine | Dragonfly 4 Pro | 4.0 inch | CHIRP DownVision |
Reading Specs Like a Pro
Do not get distracted by “peak-to-peak” wattage numbers. Look for RMS (Root Mean Square) wattage. A 300W RMS unit is solid. Anything under 150W RMS will struggle in deeper water. Also, check the pixel count. A 480 x 320 pixel display is good. 240 x 160 pixels is acceptable for basic depth reading but poor for fish arch identification.
Identifying Fake Reviews and Marketing Gimmicks
If a product claims to “see through mud” or “find fish automatically,” be skeptical. No sonar can penetrate mud or gas bubbles. Look for reviews on dedicated fishing forums like Bass Boat Central or Reddit r/Fishing. Compare specifications with the manufacturer’s official website. Avoid products with no distinct brand name or generic Chinese branding without UL or CE certification.
Can You Use a Portable Depth Finder for Kayak or Ice Fishing?
Yes, portable depth finders are excellent for kayaks and ice fishing. Many budget units come with portable kits that include a soft carrying case, suction cup transducer mount, and a rechargeable battery pack. These units are completely self-contained and can be moved between boats or used on the ice. Look for models with ice fishing modes that adjust sensitivity for cold water.
Suction Cup Mounts: Do They Work?
Suction cup mounts work well on kayaks, small boats, and rental boats if you clean the mounting surface thoroughly. Saltwater and vibration from larger engines can cause suction cups to fail. For permanent installation on a kayak, consider a through-hull transducer gland or an adhesive mount. For ice fishing, a portable arm that attaches to your sled is ideal.
Portable Battery Options for Budget Units
The best portable battery for a budget depth finder is a 12V 7Ah sealed lead-acid battery. It is affordable, widely available, and runs most units for a full day. If you want lighter weight, consider a 12V lithium-ion pack, but expect to pay double. For ice fishing, a rechargeable 18V tool battery with an adapter works perfectly and is much lighter than lead-acid.
How to Install a Cheap Depth Finder Without Professional Help
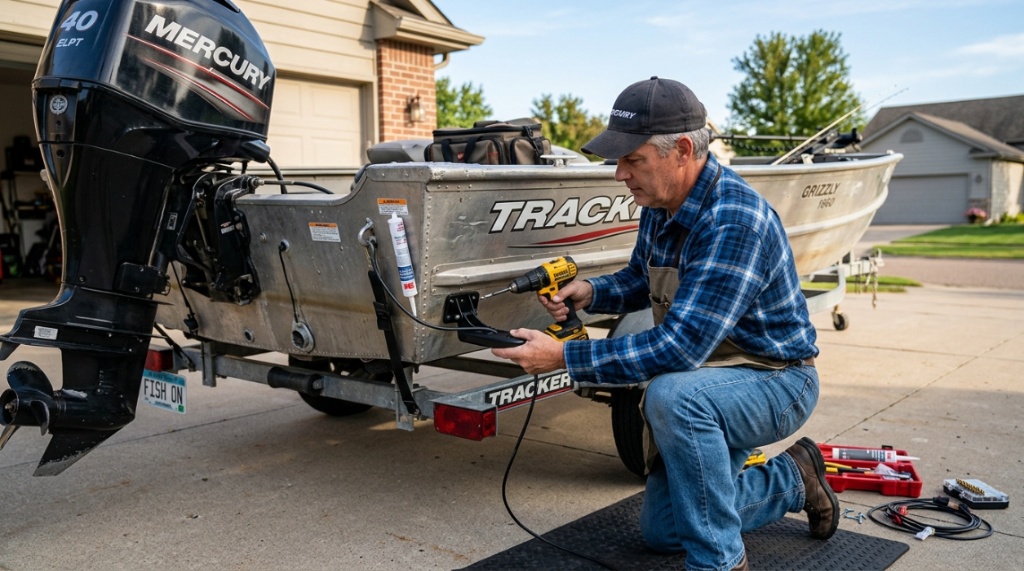
Installing a budget depth finder is a weekend DIY project that anyone can complete with basic tools. You need a drill, screwdriver, wire strippers, and a 12V power source. All budget units come with mounting hardware and wiring diagrams. The most challenging part is running the transducer cable from the transom to the console without snagging.
Step-by-Step Installation Guide
- Mount the transducer on the transom. Ensure it is level with the bottom of the boat and below the livewell drain.
- Run the transducer cable along the boat’s gunwale, using zip ties every 12 inches.
- Mount the display unit on the console or a RAM mount. Do not drill into fiberglass without a pilot bit.
- Connect the display to a 12V power source. Use an inline fuse rated for 2–3 amps.
- Power on the unit, and test it in shallow water (5–10 feet) to confirm depth reading.
Common Installation Mistakes to Avoid
Do not mount the transducer directly behind a strake (hull ridge) or directly next to the propeller wash. This causes turbulence and false readings. Do not route the power cable parallel to spark plug wires to avoid electrical interference. If the unit shows a depth reading of “0” or “—” constantly, check the transducer cable connection and ensure the transducer is in the water.
Where Is the Best Place to Buy Affordable Depth Finders?
Online retailers like Amazon, West Marine, and Tackle Warehouse offer the best prices on budget depth finders. Local stores often have higher prices but allow you to see the display in person. For the best value, consider refurbished units from the manufacturer’s outlet store. These carry the same warranty as new units but cost 20–30% less.
Amazon vs. Specialty Fishing Retailers
Amazon has the widest selection and fastest shipping, but you must verify the seller is authorized. Third-party sellers may sell gray market units without warranty. Specialty retailers like TackleDirect or DiscountRam offer expert customer support and verified authentic products. If you are unsure, pay the extra 5% for a specialty retailer.
Refurbished and Open-Box Units: Should You Buy?
Refurbished units direct from brands like Garmin or Lowrance are an excellent way to get a high-end feature set at a budget price. Open-box units from big-box stores like Cabela’s or Bass Pro Shops are also good. Ensure the return policy covers at least 30 days and the warranty covers electronics for at least one year. Avoid units that are labeled “for parts or not working.
It is not the most expensive, and it is not the cheapest. It sits in the $100–$150 range, built by a company with a reputation for marine electronics. Your next step is simple: decide whether you fish shallow ponds, deep lakes, or coastal bays, and a cheap depth finders that work will transform your days on the water. Stop guessing. Start fishing with confidence.
How to Maintain a Budget Depth Finder for Longevity
Proper maintenance is simple and extends the life of your cheap depth finders that work by years. Rinse the transducer with fresh water after every saltwater trip. Remove the display from direct sunlight when the boat is stored. Keep the cable connections clean and coated with dielectric grease to prevent corrosion. Store the unit in a dry, climate-controlled location.
Winterizing Your Depth Finder
If you live in freezing climates, remove the display and battery indoors. Check the transducer for ice damage. If the transducer is glued in place with epoxy, that epoxy can crack in extreme cold. Disconnect the battery completely and charge it to 50% capacity before storage. Recharge the battery every two months during winter to prevent sulfation.
Software Updates for Budget Units
Many budget units from major brands offer firmware updates via USB. These updates improve sonar performance, fix bugs, and sometimes add features. Visit the manufacturer’s website and download the update tool. Even if your unit is cheap, keeping the firmware current ensures you get the best possible performance from your hardware.
Frequently Asked Questions
Can I use a cheap depth finder in deep saltwater?
Yes, but with limitations. Budget units with 200W RMS and 200 kHz frequency are effective to about 250 feet in clear saltwater. Murky saltwater reduces range. For deeper use, look for a unit supporting 50 kHz or 83 kHz for better penetration.
Do I need GPS to find depth?
No. GPS helps you mark waypoints and return to productive spots, but it is not required for depth readings. The sonar transducer provides instant depth information regardless of GPS functionality. Many budget units omit GPS to keep costs down.
How accurate are cheap depth finders?
Highly accurate, typically within 1–2 percent of actual depth when the transducer is properly installed. Units with CHIRP sonar are often more accurate than single-frequency units in varying water conditions. Calibration is rarely needed.
Can I mount a depth finder on a canoe or kayak without drilling?
Yes. Use a portable kit with a suction cup transducer mount and a RAM ball mount for the display. These kits are designed for soft-shell watercraft and leave no permanent damage. Ensure the suction cup is cleaned and secured.
What does the fish arch mean on a cheap depth finder?
Fish arches appear when a fish swims through the sonar cone. The shape and size of the arch indicate the fish’s position and relative size. Cheap units display arches well in 2D sonar mode. Down imaging may not show arches as clearly.
Is a color display worth the extra money?
Yes. Color displays drastically improve readability in bright sunlight and allow you to distinguish between bottom hardness, fish, and structure. Grayscale displays are difficult to read in direct glare. Budget an extra $20 for color.
How long does a budget depth finder last?
With proper maintenance, a budget depth finder from a major brand lasts 5–7 years. The most common failure is corrosion on the transducer cable connector or the power switch. Storing the unit indoors and rinsing with fresh water extends lifespan.
Conclusion
Finding cheap depth finders that work is not about settling for less. It is about buying exactly what you need for the waters you fish. You now know that CHIRP sonar, a clear color display, and a quality transducer are the only features that truly matter. You understand which brands to trust, how to install the unit yourself, and how to maintain it for years of reliable service. The perfect budget depth finder is already on the market.